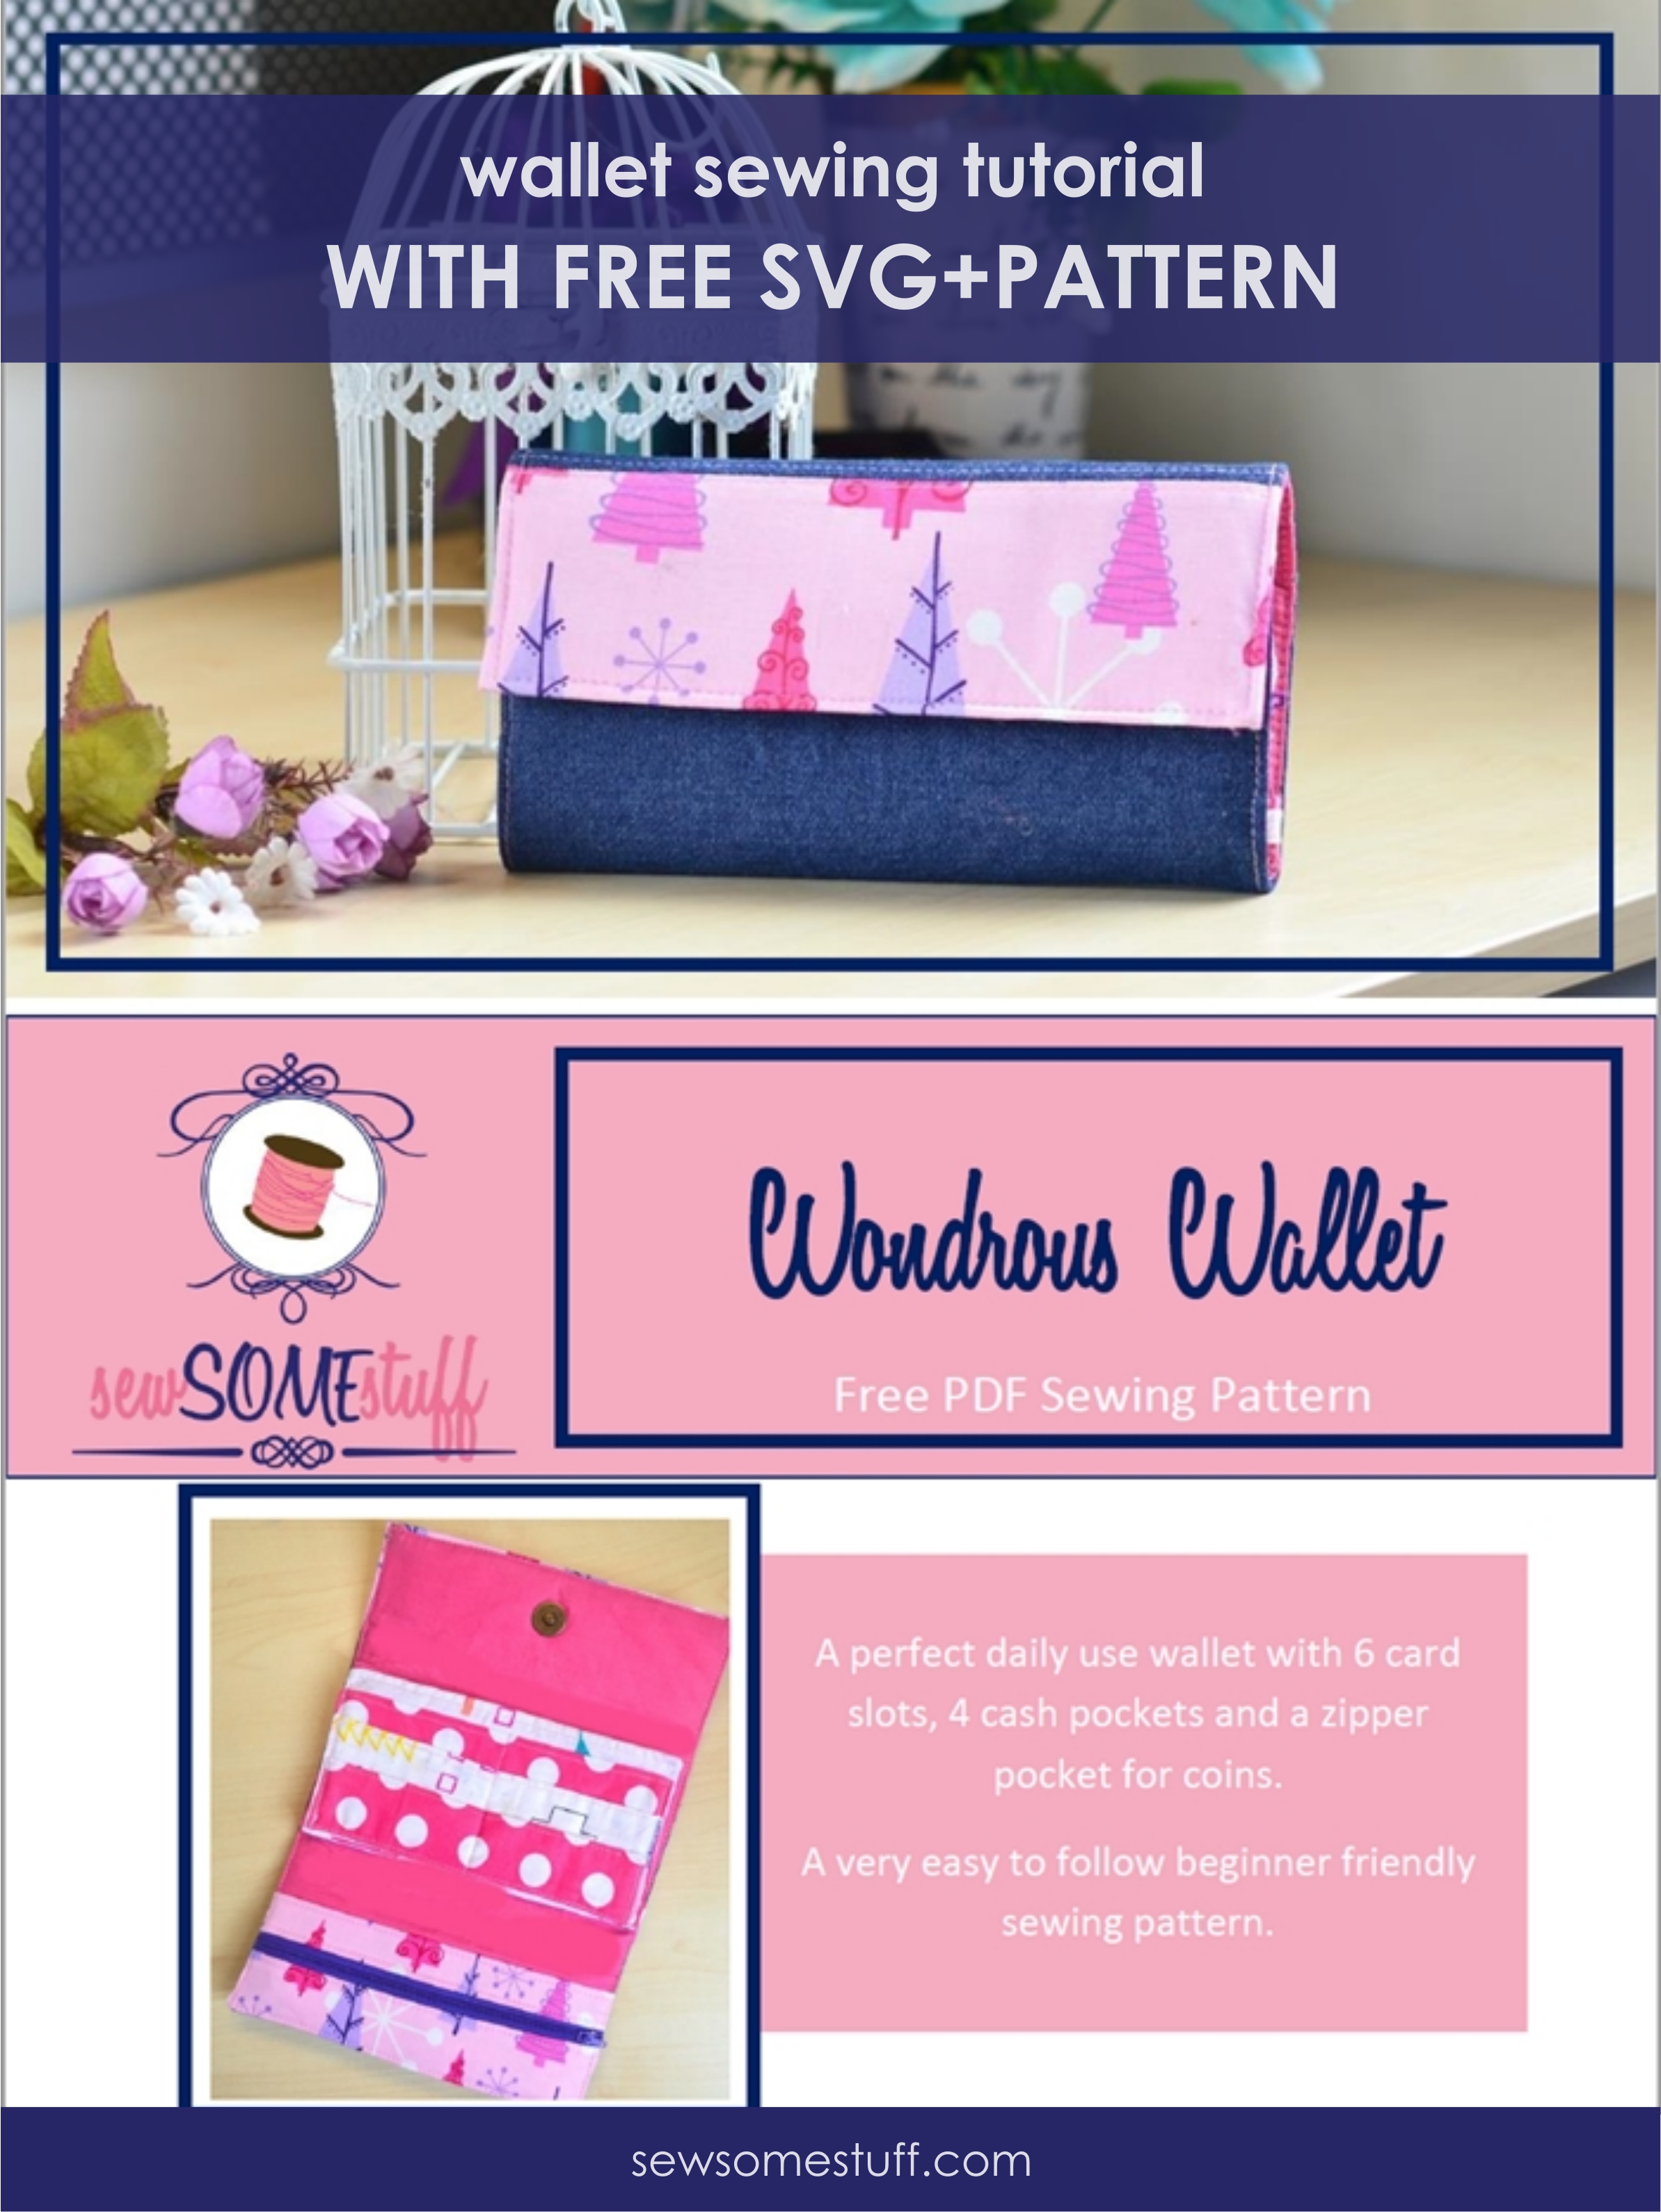
In this post, I’m sharing a free wallet pattern and a fabric handmade wallet tutorial. This DIY wallet makes a perfect gift for everyone. Learn in detail how to sew a wallet out of fabric. Also, links are included for other wallet sewing patterns.
Can I ask you a question sewing buddy? I promise it’s not awkward or personal.
How many times do you change your wallet? Like, seriously? It’s okay, you can tell me. I will not pass the information to your finance manager. If you ask me, I would change my wallets daily like I change my bags if they weren’t so full of things.
But it’s okay if you like to keep 10 wallets at a time and change them daily, weekly or monthly. Let me help you get rid of that guilty feeling of keeping a collection of wallets. I have a fabric wallet tutorial + free sewing pattern aka Wondrous Wallet sewing pattern for you so you can make as many wallets as you want to match your dress/shoes/lip-gloss, etc. etc.
Let’s get onto it right away.
Super Simple Handmade Wallets Made by Others
Handmade Wallet Tutorial
“DISCLAIMER: Sew Some Stuff is a participant in the Amazon Services LLC Associates Program, an affiliate advertising program designed to provide a means for us to earn fees by linking to Amazon.com and affiliated sites.
This post contains affiliate links.”
Some tips on sewing fabric wallets
Before we begin, I would like to give a little glimpse of the reality of what it’s like to actually sew a fabric wallet and what you can do to make sure you’re not swearing your head off while you’re in the process. Really, it’s possible.
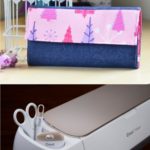
1. Fabric wallets have a ton of layers so it’s best to use a walking foot as it can really make sewing with layers a smooth process. It’s an affordable long-term investment. I barely sew bags with normal foot since the time I purchased a walking foot. The picture below shows what a walking foot looks like. Click over to place an order now if you use a domestic sewing machine and you would never be grateful enough.
2. Since wallets have several layers it’s best to use clover clips instead of dainty pins to hold the layers together as pins can be tricky and can easily bend. Also, say goodbye to getting poked every now and then. Here is what clover clips actually look like.
Now that you’re ready to sew your first ever handmade wallet – The Wondrous Wallet, it’s time to grab the supplies and notions.
Supplies needed for Handmade Wallet Tutorial (Wondrous Wallet)
- Cricut Maker (if you’re going to cut the fabric using Cricut Maker)
- 3-4 FabricGrips Mats (if you’re going to cut the fabric using Cricut Maker)
- Brayer and Remover Tool (if you’re going to cut the fabric using Cricut Maker)
- Cricut Essential Tools Kit (if you’re going to cut the fabric using Cricut Maker)
- 1/4 yard of fabric A, B, C, D, and E (quilting cotton)
- ½ yard of medium weight fusible interfacing (SF 101)
- ¼ yard fusible fleece
- 1 set of magnetic snaps
- 1 7” zipper matching fabric D
- Free SVG file and pattern. Can be grabbed by signing up for the VIP list below
Notions needed to sew Wondrous Wallet
• Zipper foot
• Clover clips
• Fabric glue
• Walking foot
• Fabric marker/chalk
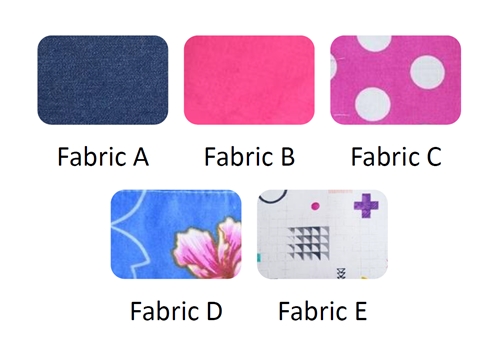
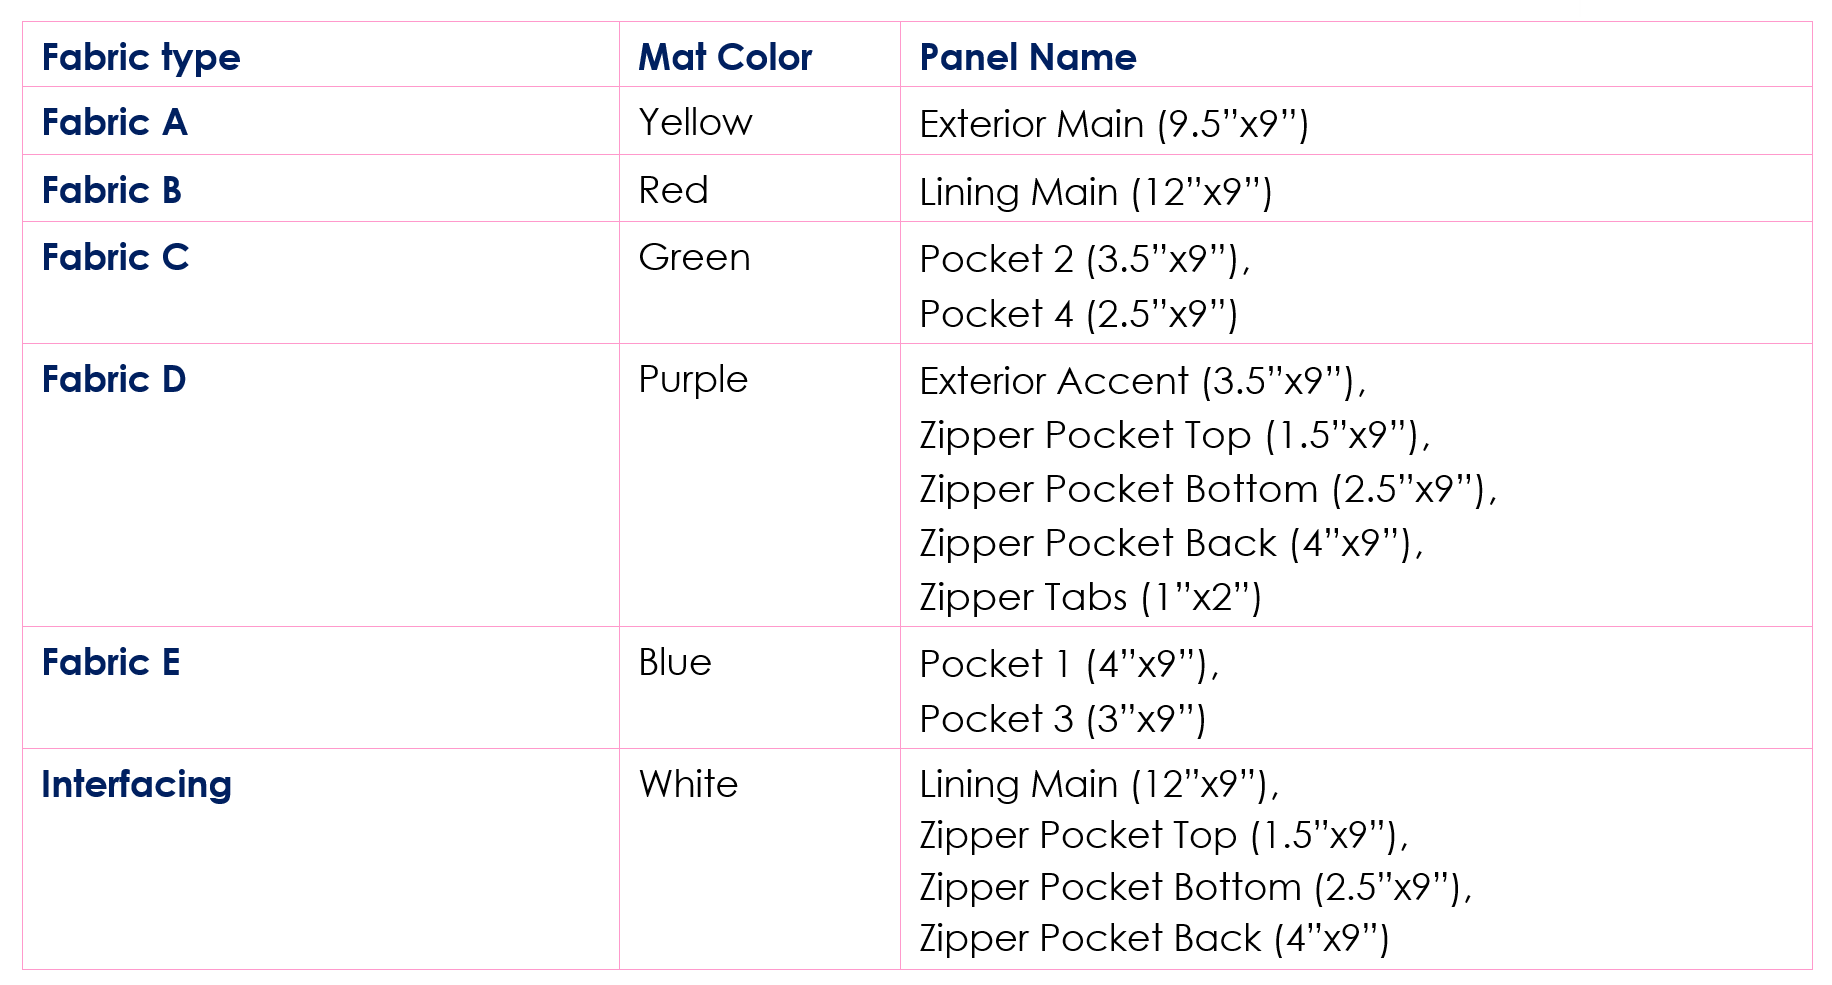
Here’s the reference key for all the fabrics I used
Now that we have our supplies and notions ready, let’s get down to cutting. But before we proceed, can you promise me to label ALL your pieces with post-it notes right after you cut them out? Yes? Okay then, let’s get some cutting done.
BTW the Wondrous Wallet pattern comes with pre-made rectangle templates that you can print and use directly to cut out the pieces without having to measure anything. Want to get the pattern? Just subscribe to the newsletter using the box below.
By signing up you also agree on receiving the weekly newsletter. Unsubscribe anytime.
Okay onto cutting.
Cutting Handmade Wallet Panels using Cricut Maker
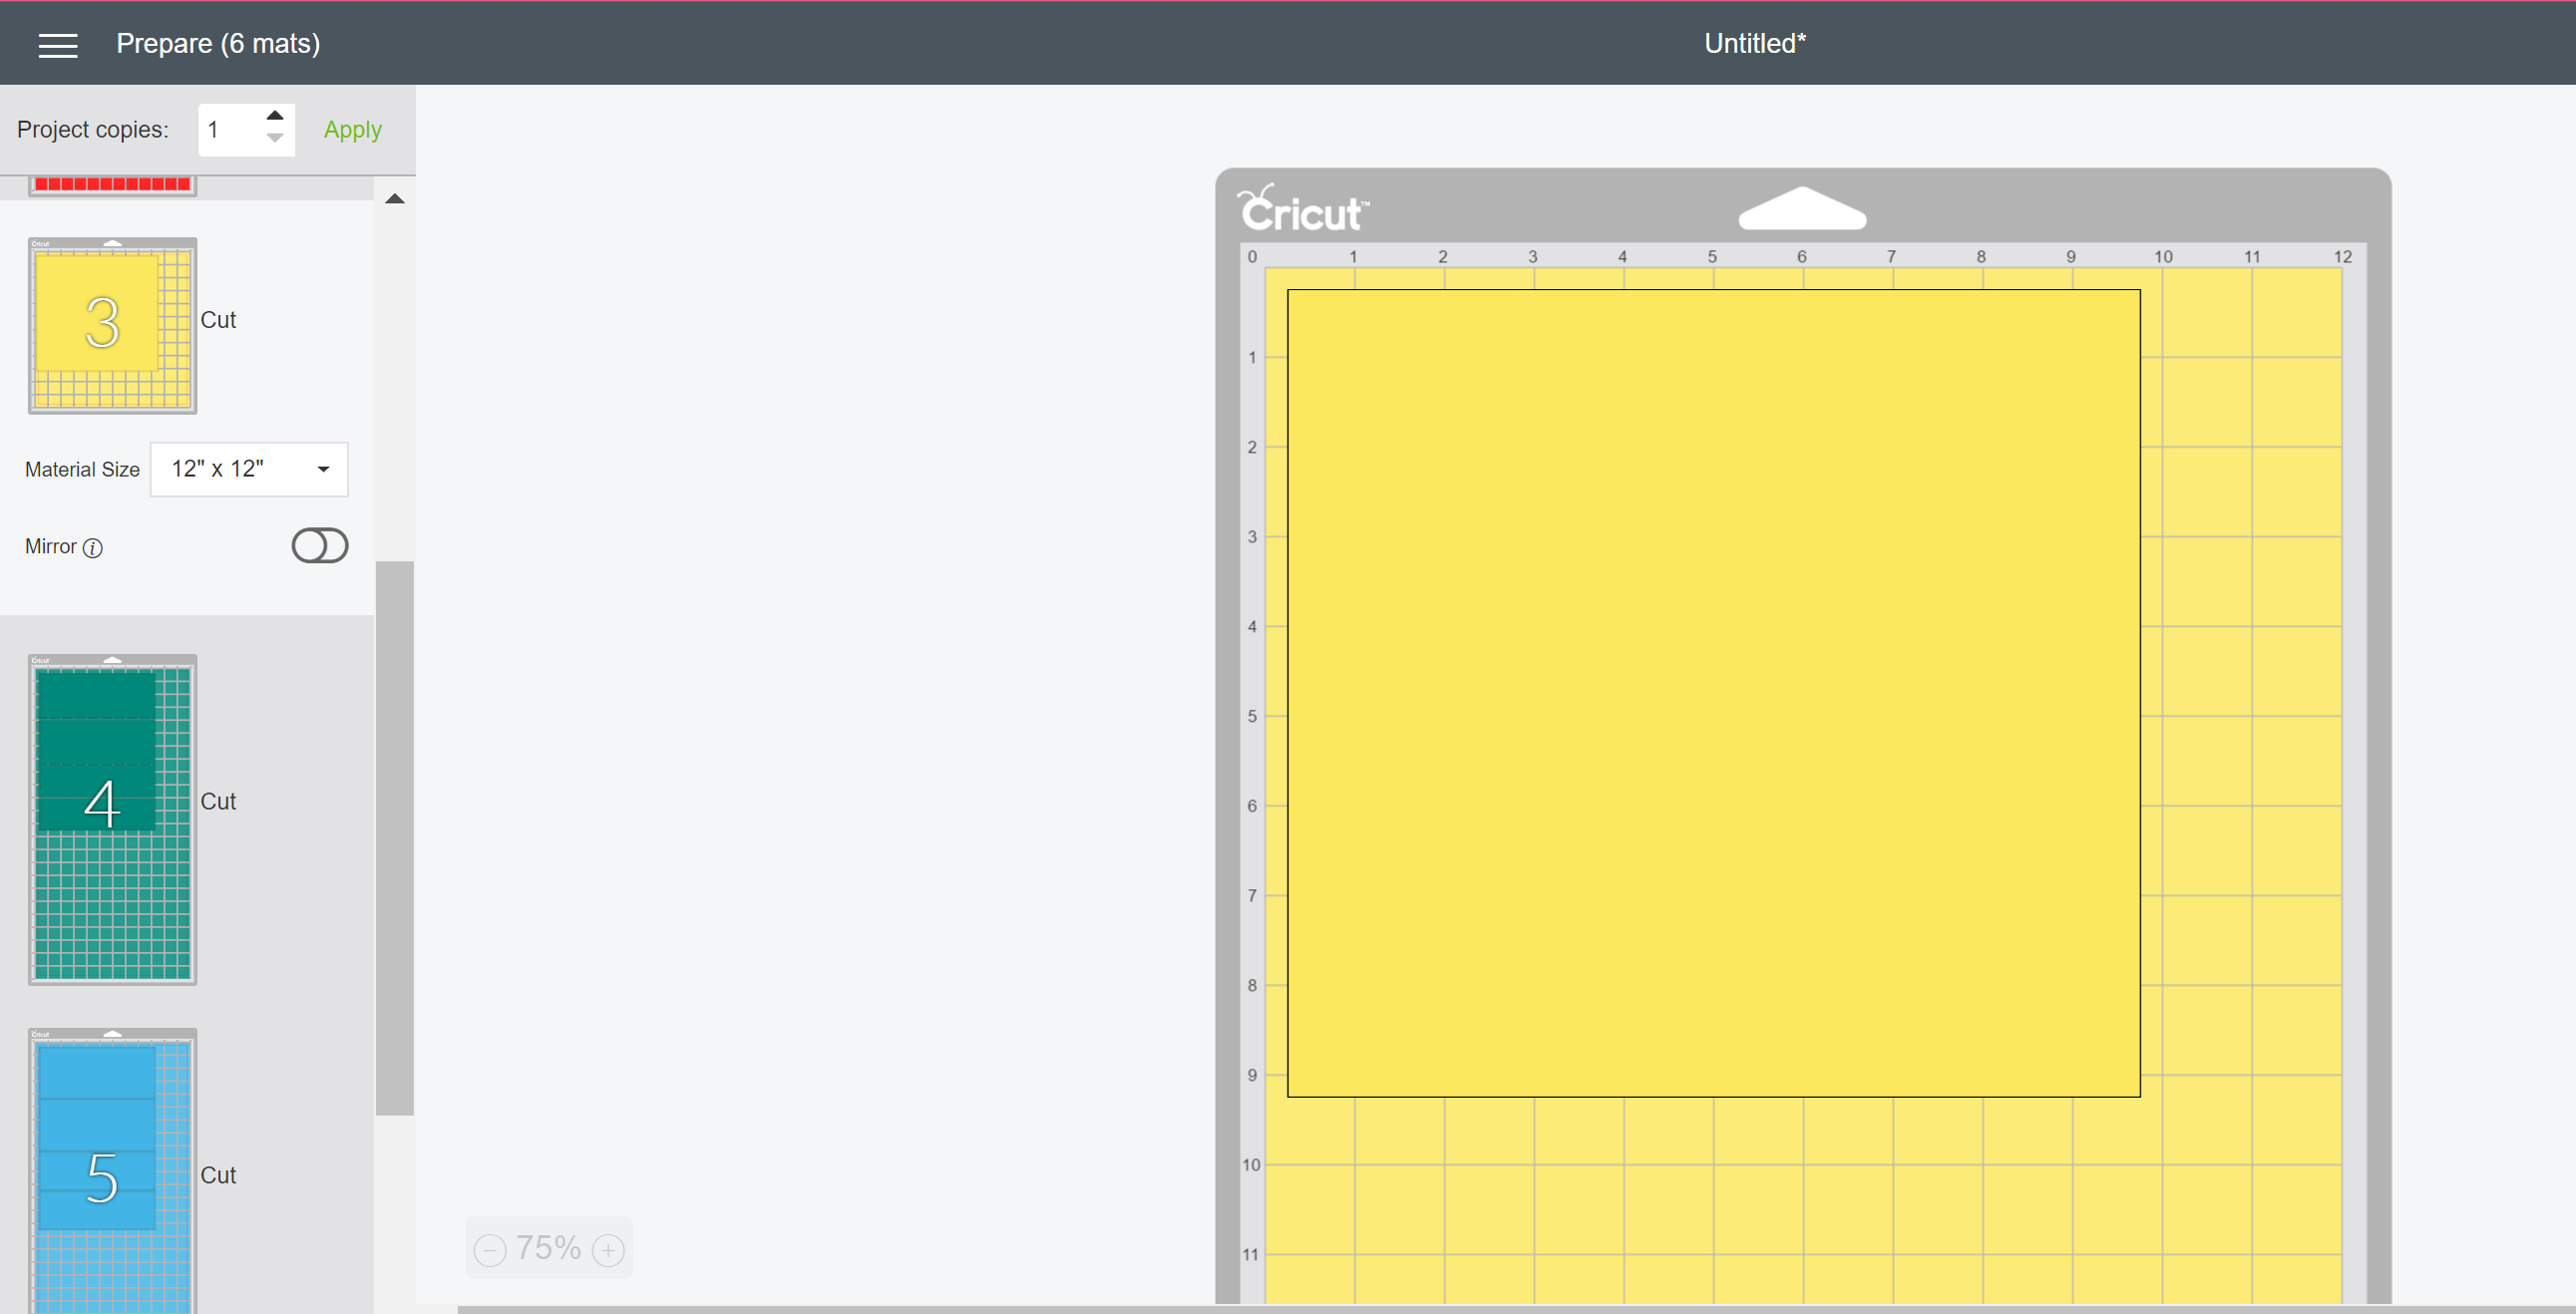
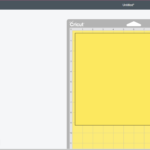
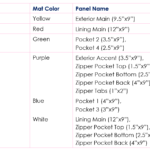
When cutting using Cricut Maker, we need to use color codes to differentiate different fabric panels. Once the color-coded SVG file is uploaded, Design Space software automatically arranges all the panels on different colored mats based on the colors as you can see from the image below. These mat colors are independent of the usual pink, green and purple Cricut mats.
So, let’s say you choose Fabric A for Exterior Main, you would place Fabric A on the yellow Mat. Same goes for everything else.
Cut out the following pieces to sew your Wondrous Wallet (if cutting manually)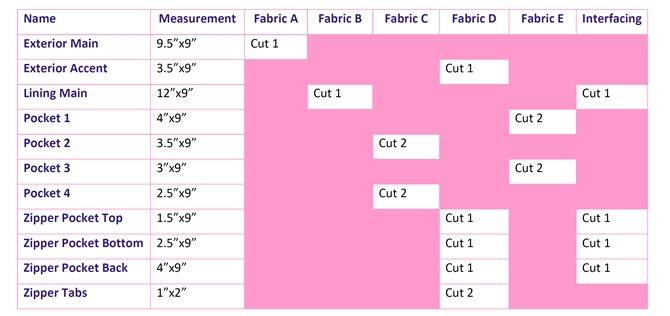
Cut 1 fleece measuring 12”x9”. If using fusible fleece, reduce the length to 11”x8” to avoid bulk while sewing or if you’re using non-fusible fleece you can also cut it to 11”x8” and use an adhesive spray to stick it to the fabric.
Also, cut 4 pieces of medium weight interfacing measuring 3”x3” for attaching magnetic snaps.
So, do you have all your pieces ready, cut and labeled as you promised? LET’S GET THE PARTY STARTED.
How to sew Wondrous Wallet – Easy Handmade Fabric Wallet
First and foremost, fuse ALL fusible interfacing to their respective pieces.
Now let’s move to step 1.
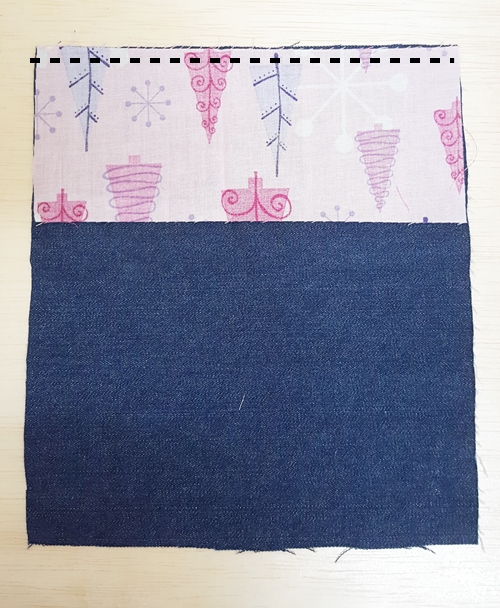 |
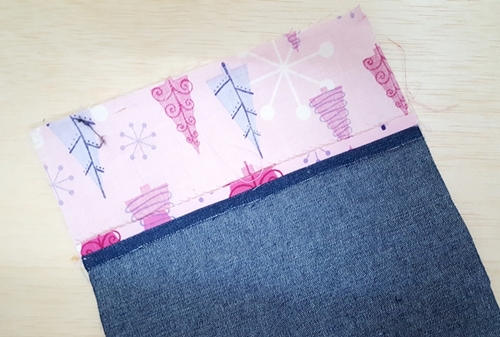
Step 1: Sew Exterior Main and Exterior Accent together of Handmade Wallet a) Place Exterior Main and Exterior Accent together so that right sides are facing each other. Align the top raw edges, sew the two layers together using a seam allowance of ½”. Tip: If you’re using directional fabric for Exterior Accent, make sure the fabric is pointing downwards. |
 |
b) Press open the seam. This panel will now be referred to as “Finished Exterior”. Fuse fusible fleece at the wrong side of the panel. |
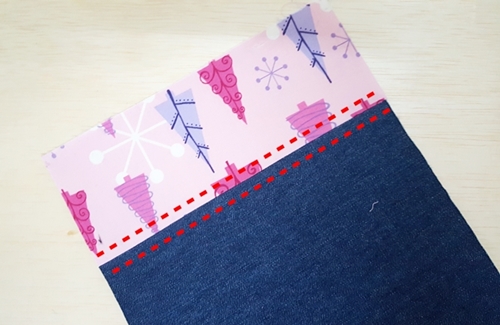 |
c) Top-stitch on the opposite sides of the seam, using a seam allowance of 1/8” and wide stitch length as shown by the red dotted lines. |
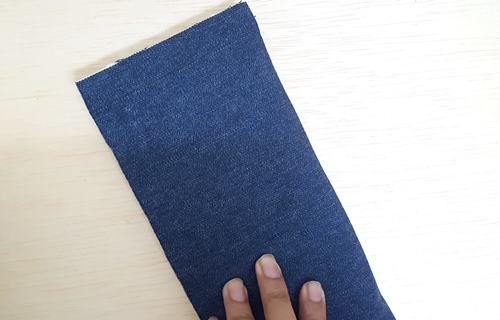 |
Step 2: Add Female Magnetic Snap to Finished Exterior a) Fold the bottom side (side without accent) of Finished Exterior in half. Finger press to make a center crease. |
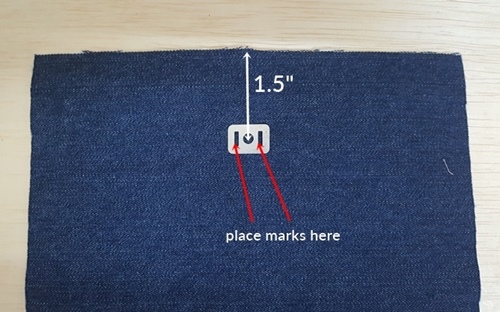 |
b) Place magnetic snap plate on the right side of Finished Exterior so that the center of the plate is on the center crease. The center of the plate should also be 1½” away from the short raw edge of Finished Exterior as shown on left. Place two marks on prong slots using a pointed pen or removable fabric marker. |
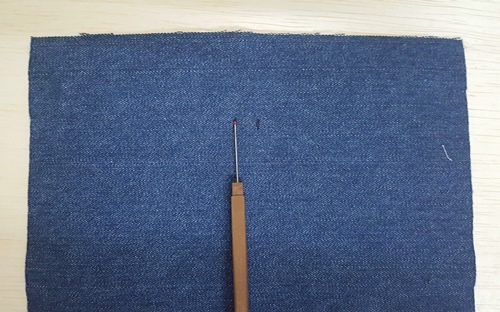 |
c) Use a seam ripper to make a slit JUST ALONG the small mark you made in the previous step. It should be big enough to accommodate the prongs. |
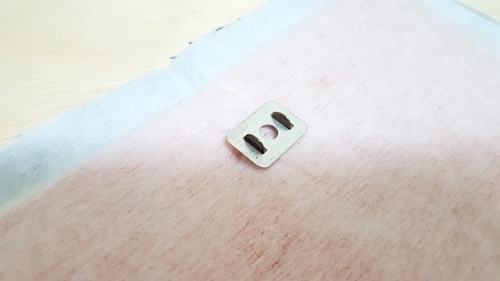 |
d) Insert female snap prongs through the slits. Place the plate on top. Knock to fold the prongs. Cover the plate and prongs with a piece of fusible interfacing measuring 3”x3”. |
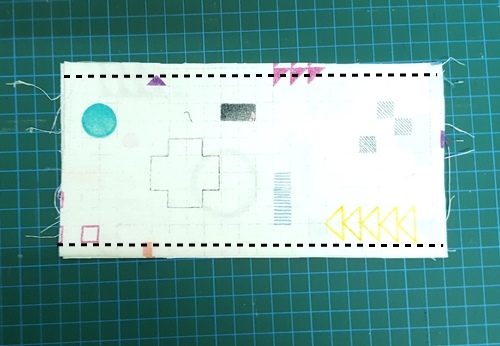 |
Step 3: Sew Pockets for Handmade Wallet a) Place Pocket 1 right sides together and sew ONLY along the top and bottom edges. Use a seam allowance of 3/8”. b) Turn Pocket 1 right side out. Press seams flat and top-stitch ONLY the top edge. Use a seam allowance of 1/8”. c) Repeat steps (a) and (b) for Pocket 2, Pocket 3 and Pocket 4. |
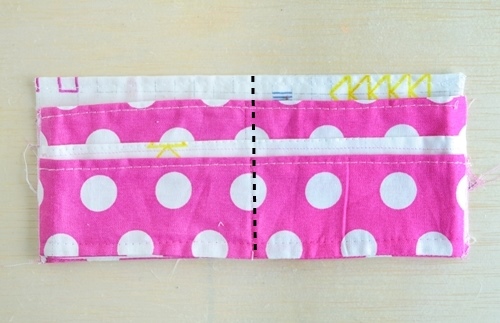 |
d) Place Pocket 2, 3 and 4 on top of Pocket 1, aligning the bottom edges ONLY. Pin the layers together. Fold in half, matching the two short sides, finger press to make a center crease. Draw a line on the crease using a removable marker. e) Top-stitch ON the line you just drew to sew the layers of Pockets together along the center. This will now be referred to as Pocket Layers. |
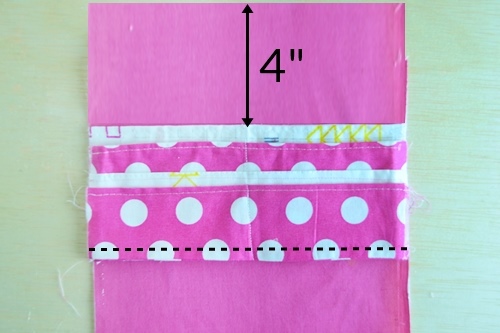 |
f) Place Pocket Layers on the right side of Lining Main so that the top edge of Pocket 1 is 4” away from the short top edge of Lining Main. The short raw edges of Pocket Layers should be aligned with the side raw edges of Lining Main. g) Sew Pocket Layers to Lining Main ONLY along the bottom edge as shown by dotted lines in the image. Use a seam allowance of ¼”. |
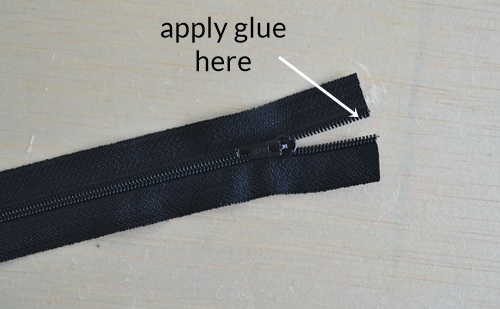 |
Step 4: Sew Zipper Pocket for Handmade Fabric Wallet a) Apply glue on the inner edge of the zipper. Hold the two sides together using clover clips till the glue dries off. |
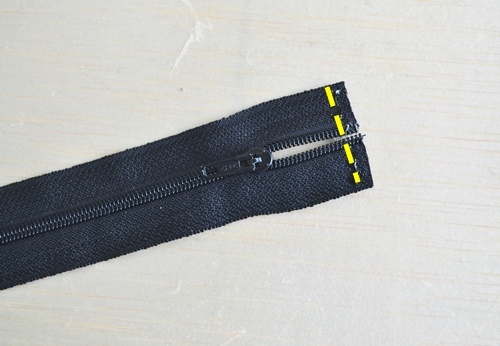 |
b) Apply a thin line of glue along the short edge as shown by yellow dotted lines ¼” away from the edge. |
 |
c) Place one of the Zipper Tabs right side down on the edge of the zipper as shown in the image. |
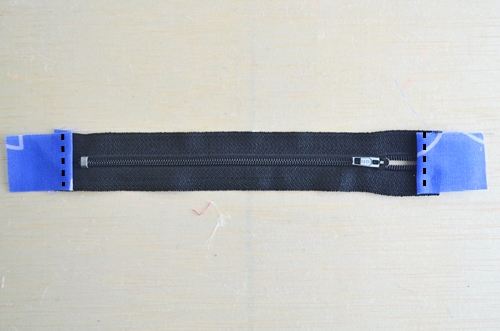 |
d) Fold Zipper Tab over matching the wrong sides and sew along the folded edge using a seam allowance of ¼” as shown by the dotted lines. Repeat steps (b) till (e) for the other side of the zipper. |
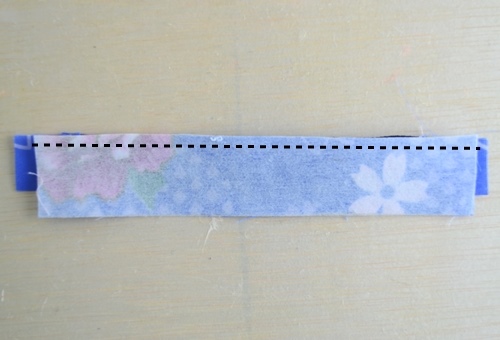 |
e) Place Zipper Pocket Top on the zipper, aligning the top raw edges so that the right sides are facing each other. Sew the zipper to Zipper Top using a seam allowance of ¼”. (You might want to use a zipper foot for this step.) Finish off the edges using a zig zag stitch. |
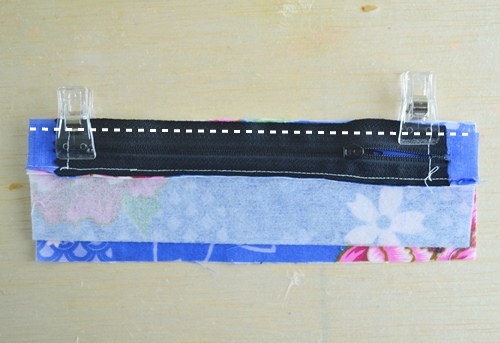 |
f) Align top raw edge of Zipper Bottom with the raw edge of the zipper, right sides facing each other. Sew the two together using a seam allowance of ¼”. Finish off the edges off the edges using a zig zag stitch. |
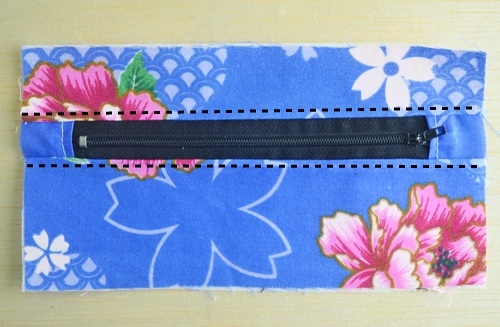 |
g) Turn the seams away from the zipper and press. h) Top-stitch as shown by the dotted lines in the image. This piece will now be referred to as Zipper Front. |
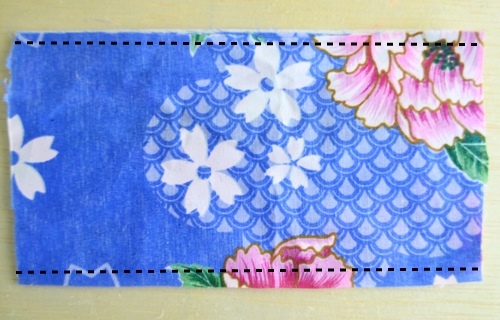 |
i) Place Zipper Back and Zipper Front right sides together and sew ONLY along the top and bottom edges as shown by dotted lines. Use a seam allowance of 3/8”. Finish off the edges using a zig zag stitch. |
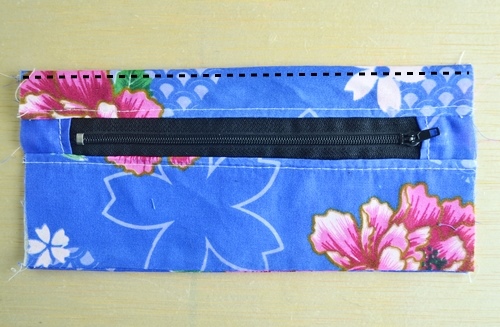 |
j) Turn right side out and top-stitch ONLY along the top edge as shown by the dotted lines. Use a seam allowance of ¼”. This will now be referred to as the Zipper Pocket. |
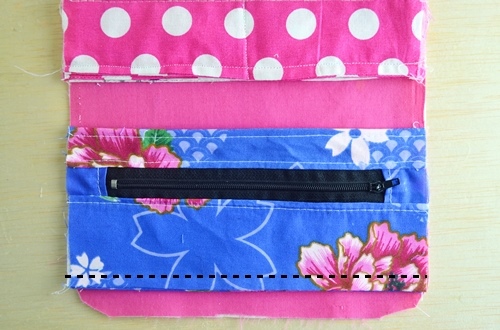 |
k) Place Zipper Pocket on the right side of Lining Main so that it is ½” away from the bottom edge of Lining Main and sew it to Lining Main ONLY along the bottom edge using a seam allowance of ¼”. |
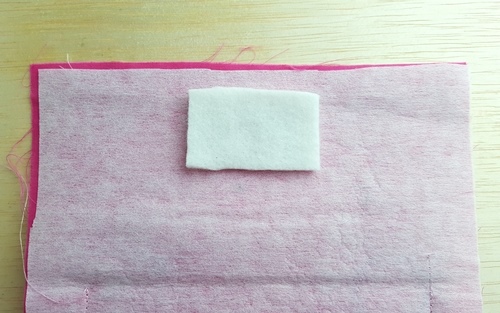 |
Step 5: Attach Male magnetic snap to Lining Main a) Fuse 2”x3” fusible fleece on the wrong side, ½” below the top edge of Lining Main. This should be done just above the Divider. |
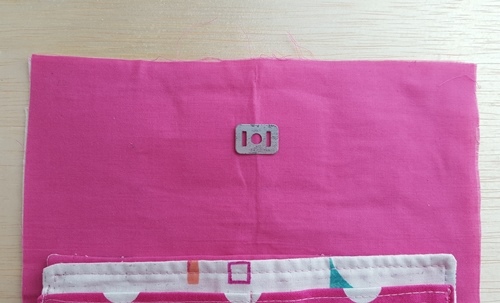 |
b) Fold Lining Main in half to make a crease at the center. Place Male metal plate so that the center of the plate is ON the crease and is 1½” away from top edge. c) Mark the prong openings using a removable fabric marker. |
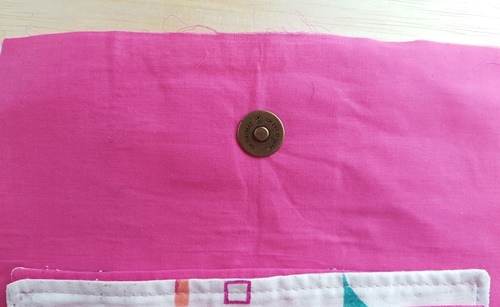 |
d) Use a seam ripper to make a slit through Lining Main and fusible fleece ONLY along the mark you made. e) Insert Male snap prongs through the slit. |
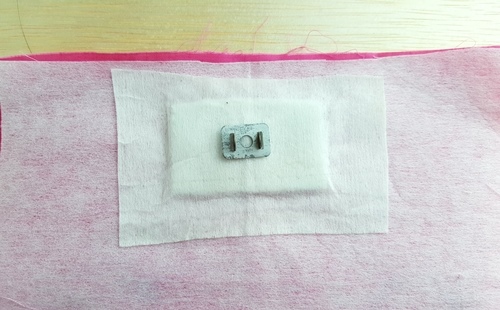 |
f) Insert the metal plate to cover the prongs. |
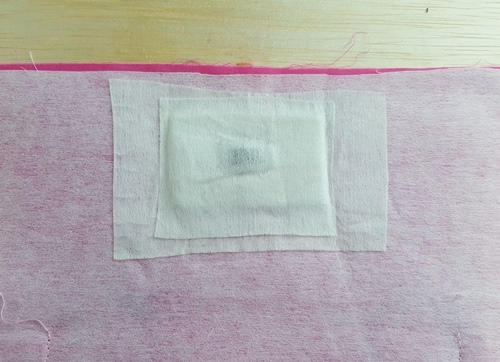 |
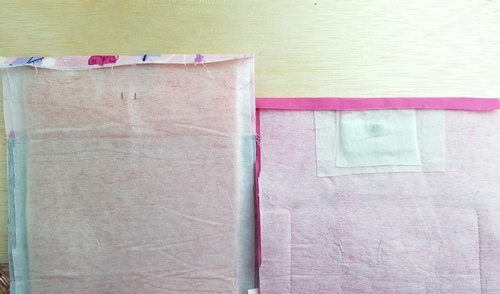
g) Fold the prongs over. Fuse a piece of interfacing to cover the metal. |
 |
Step 6: Assemble the wallet a) Fold the top raw edges of both Finished Exterior and Lining Main to the wrong side by ½” and press. |
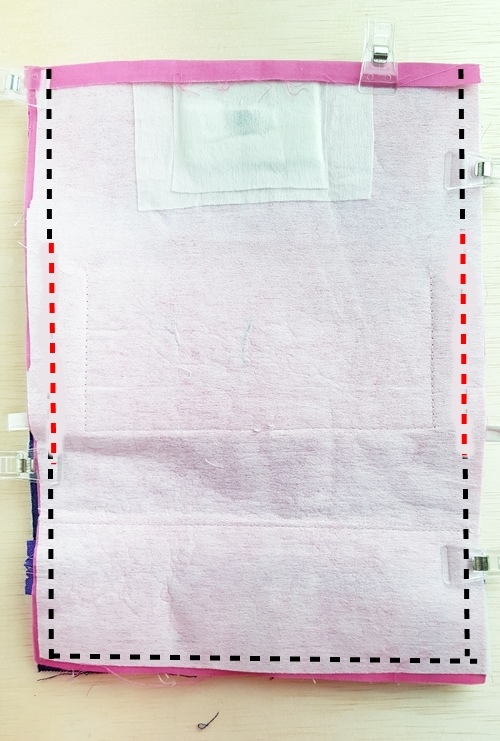 |
b) Place Lining Main and Finished Exterior right sides together and sew ONLY the side and bottom edges using a seam allowance of 3/8”. c) Clip ONLY the bottom corners. d) Turn right side out and press the edges flat. |
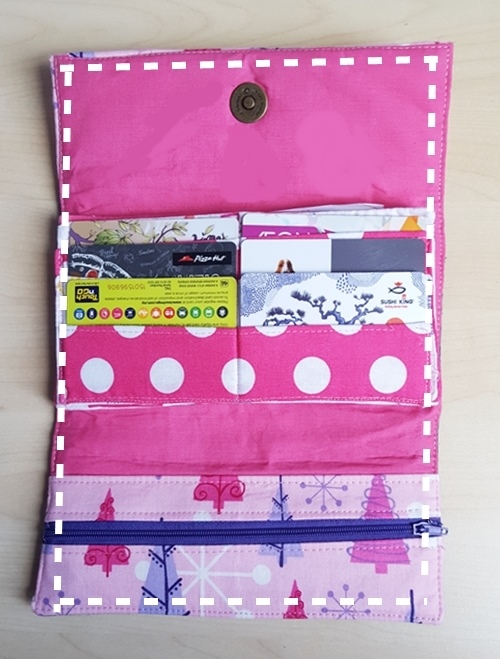 |
e) Top-stitch all the edges using a seam allowance of 1/8”. Your Wondrous Wallet is ready! Yeay! |
The End!
Whew! Now that was a LOT of work, wasn’t it? But, I’m sure you’re going to totally LOVE this wallet and you wouldn’t even remember all this when you start getting compliments and the best thing ORDERS to make this wallet. Trust me.
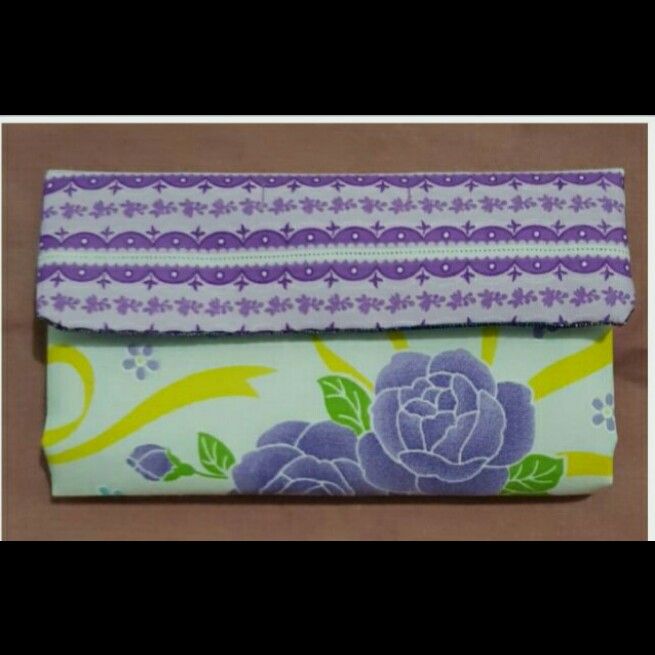
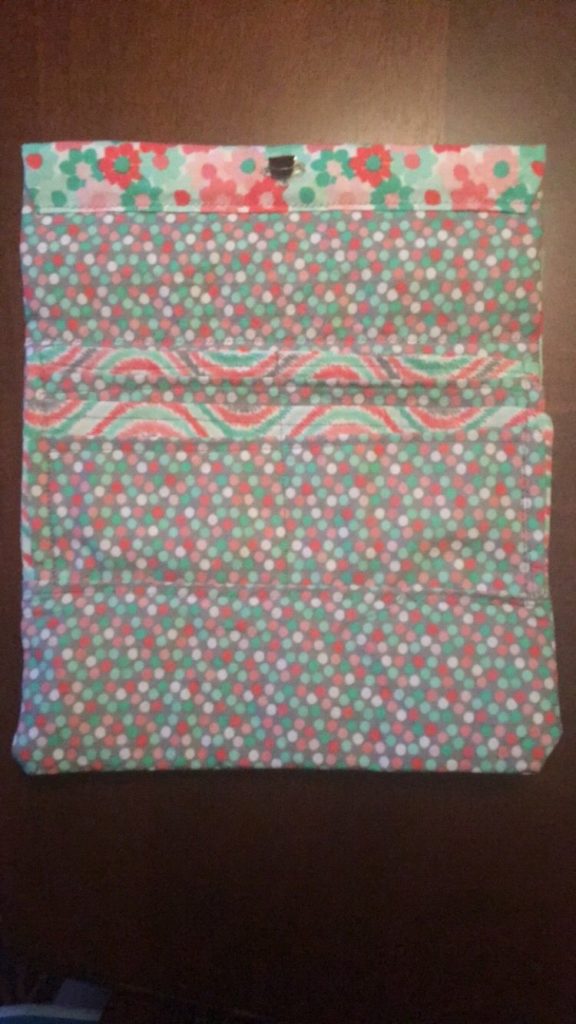
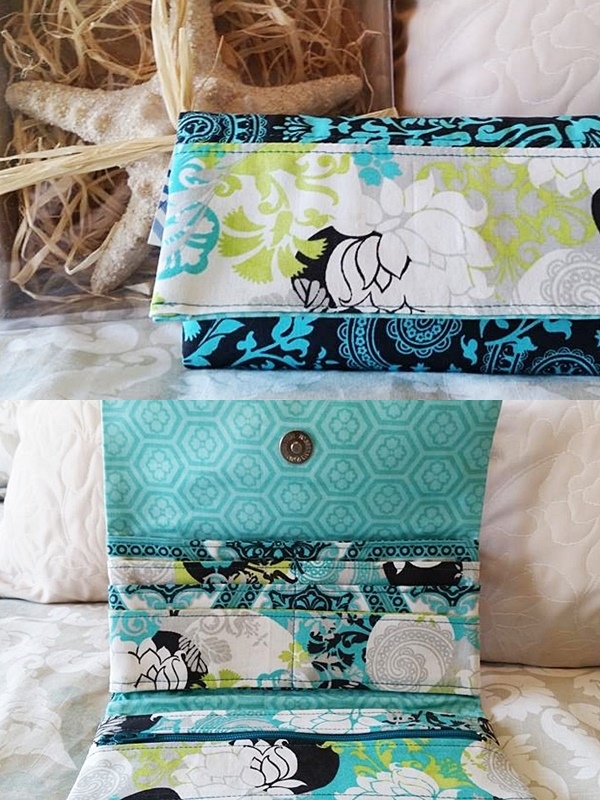
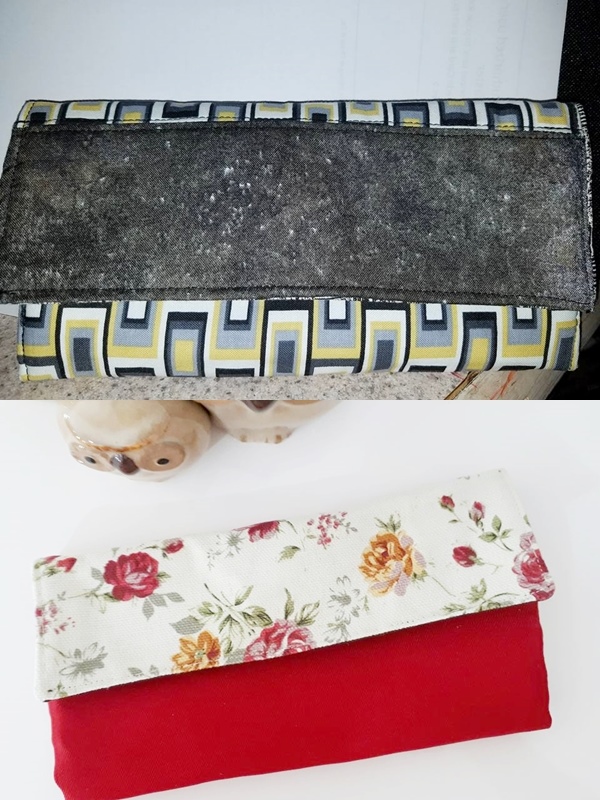
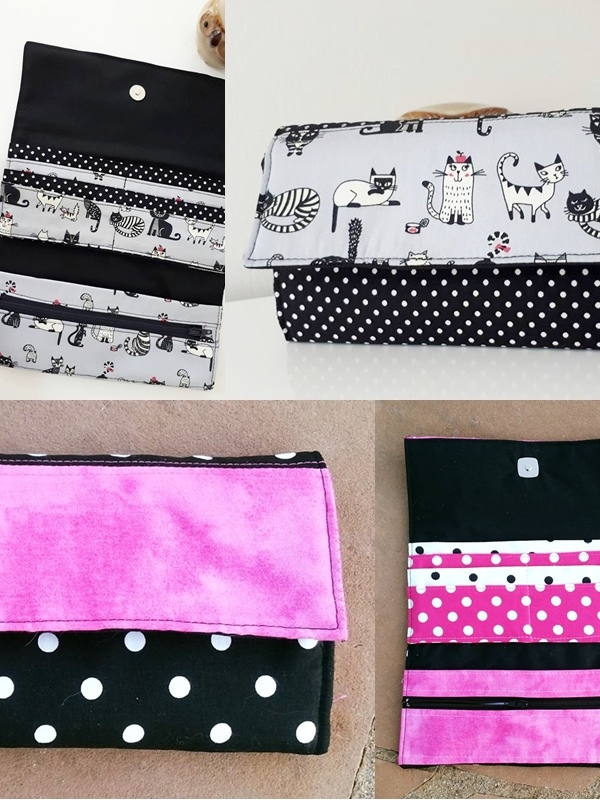
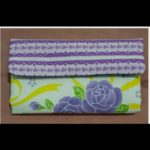
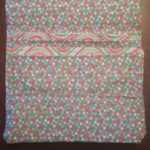
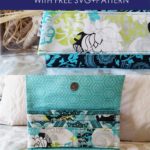
With that, we have come to the end of Wondrous Wallet Tutorial. Here are some of the testers’ Wondrous Wallets for your inspiration. Aren’t they all gorgeous?
Want more Wallet Sewing Patterns?
Check out these posts below.
- Super Easy Wallet Pattern and Tutorial with Cricut Maker
- 8 Super Cute DIY Wallet Tutorials
- DIY Easy Wallet Tutorial
- Leather Credit Card Holder Pattern + FREE SVG
More Cricut Maker Projects
11 Super Easy Cricut Maker Sewing Projects as Gifts
If you would like to get the FREE PDF pattern for Wondrous Wallet, just subscribe to the newsletter below by entering your name and e-mail address.
By signing up you also agree on receiving the weekly newsletter. Unsubscribe anytime.
Oh, wait, wait!
Can I ask you for a teeny tiny favor? Can you share this post with your sewing buddies if you found this wallet tutorial and pattern helpful? It would be a HUGE favor and I will pray that you get showered with your fav dessert every single day!


I love this cute wallet, I’m pinning for another day but when I do finally get round to giving it a try I will be sure to pop back and let you know how I get on!
Yea, sure Julie! I would love to answer all your question. 🙂
Love your #diy and how it turned out! Feel free to share it at the party @DearCreatives
Thanks so much Theresa! <3 I'd definitely.
Cute wallet and fabric, too. I made one several years ago – not like this but it is bi-fold and has a zipper, etc. I still use it. Pinning this tutorial in case I need to make another one – thanks for sharing.
Thanks for the pin Kimberley! I would love to see it when you’re done with it.
Awesome!! this is so cute! I need a new wallet! thanks for sharing at the Create Link Inspire party. You’ve been featured today and I’ve spread the word around ;o)Pinned!
Thanks so much for the feature Emily!
I apologize but I just can’t seem to follow this in my head. It would be most helpful to me if I could see a photo of the completed wallet in its open position. Thanks.
I finally figured it out!
I am making this wallet to go with a purse I just finished and I seem to have missed a step. At first you say to sew E and D pieces to the zipper. Got it. Then you say to set it aside for later, but I either missed it or it was omitted from the directions cause I have gone over this step by step numerous times and I cant find where you go back to adding the zipper to the wallet. Now I am pretty slick and will be able to figure it out on my own but I just wanted to let you know.
Thanks for the Tutorial!!
I see it now…..
I love this wallet!! I’m going on vacation soon and i made a beach bag and now ill have a cute wallet to go with it..thanks!!;!;;
Awesome! You’re welcome. Would love to see how it turned out.
Subscribed to newsletter but the wallet petter hasn’t come through….help please
Just sent it through email. 🙂
i cant find the pattern either
Sent it to your email. 🙂
I was wondering what the final dimensions are when it is closed? Please and thank you in advance.
Hi Racheal,
The size is approximate 4 inches when done.
I meant both measurements. Width and height.
Love this !saving it ,definetly want to try it out.
I can’t tell on Step 1, section b where you say to fuse the fleece to the panel whether or not it is the entire panel or just the accent piece. The picture shows just the accent piece but on your listing of needed supplies you say a 1/4 yd of fleece. I’m ready to move on so your help will be greatly appreciated.
I’m excited about this wallet- it looks awesome.
Actually, duh. I just read on the page where you have the cutting instructions about the fleece.
Hi, this tutorial is so easy to use. I made one wallet for myself. It is so addictive. I want to make more!!!
I was wondering if I could use your tutorial (I’m going to link it to your tutorial) in my blog post? I just made a few extra photo’s on my blog post. Please let me know how I can do this the best way for you?
Thank you so much.
Hi, Danielle!
Awww, thanks a bunch girl! Feels so good to hear that. The best would be to post your finished photo and then tell the readers they can get the pattern on my blog with a link. 🙂
Love the look of this wallet and I’m in the middle of making one.
I have a question about step 5/a attaching male magnetic snap to lining Main… do I fuse a 3×3 “fleece” piece or a “fusible interface” piece? It states interface but the picture looks like a fleece piece. Thank you for clarifying this for me.
Kim
Hi, Kim!
Thanks so much for pointing that out, never noticed the mistake. It’s fleece actually, and not fusible interfacing. 🙂
Thank you for clarifying that for me ?
Also in step 5/f’s pictureit looks like you put a larger piece of interfacing over the 3×3 fleece before the metal plate goes down… is this correct?
In step 2/d then would that be fusible interfacing or fleece? Sorry for all the questions, I just want it to come out as pretty as yours. Thank you
Kim
Are the measurements width x height?
OMG! I thought I was the only one who labeled everything with post-its… My aunt actually taught me about a year ago how to sew, and I haven’t left her sewing machine since. But it always drives her crazy when I have post-it’s pinned to everything and numbered or sometimes lettered. With that being said I have only one project I have never finished and that’s simply binding my last quilt, which was only put to the side to help her make a bunch of different things for a craft show. My aunt has lots of unfinished projects. I’m not counting quilt tops that are waiting on the perfect customer to pick the back. That is another pile all it’s own.
March’s craft show we are making wallets, definitely plan to use a few you have here. I really love the pink with the denim.