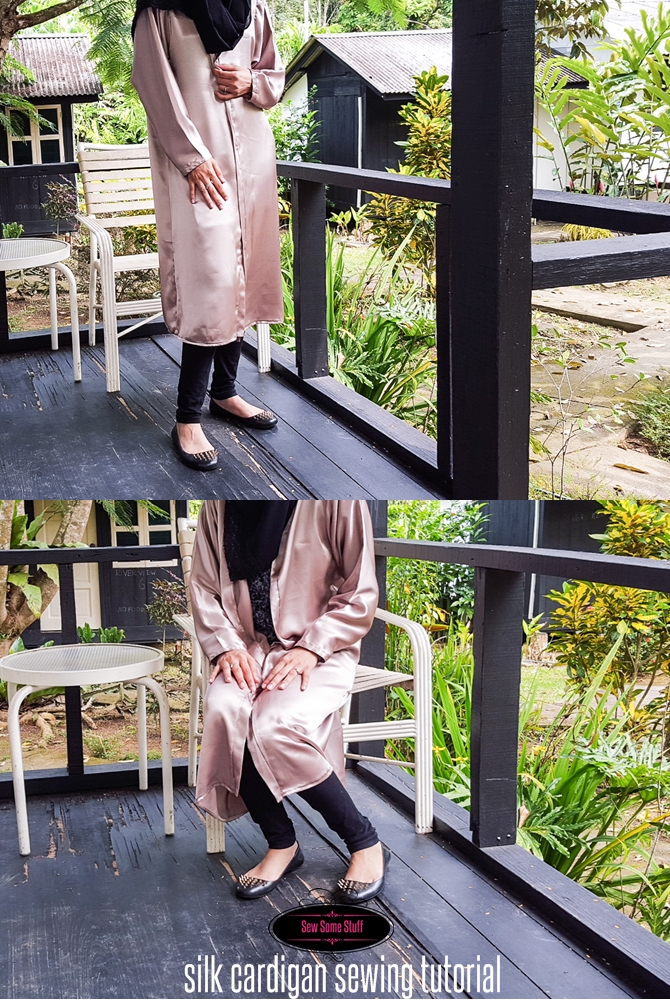
Assalam alikum girls, Javeriya here on “Islamic sewing channel – Sew Some Stuff” and today I’ll be showing you how to sew this silk cardigan. I actually made this for a friend who wanted something long with a V-neck to wear on top of her outfits.
So here are the supplies you’ll need. A 3m silk or satin fabric and your sewing supplies.

So there are two ways to sew this. This is the easier and quick method where you don’t have to attach the sleeves. I’ll show you how to do it on a miniature piece of cloth. So just imagine this is your 3 m fabric. Just fold it into a half then make another fold to make a quarter. Then cut along the sides like this. Do note that the sleeves would turn out rather short if you use this method.
Therefore I decided to make the cardigan using the pattern.
V-neck Maxi Silk Cardigan Tutorial
To make the pattern you can watch the video I uploaded here for drafting pattern from an abaya and here for drafting the sleeves.
So here are all my pieces. I’ve cut out a V-neckline too along with a edge piece. To cut the edge folding piece I measured the entire length from bottom to the shoulder and around the back neckline. So the whole length was around 85 inch. I couldn’t get the exact length from one piece of fabric so I had to cut them in parts which I later joined together. The width is around 3 inch.
Okay so let’s start sewing, I’m gonna use 5/8th inch seam allowance.
first off sew the shoulder seams together. You must have noticed, I haven’t divided the front part into half yet.
Next, pin and sew the side seams. Since this is a very slippery fabric you must take your time out and pin generously. Haha
Go ahead and trim the seam allowance and finish off the seam using a zig zag stitch. Don’t delay this because the fabric will just keep on fraying.
And now I’m going to divide the front into a half.
Next, I’m going to attach the two edge sash together and sew.
You can see that I’ve already folded and pressed it into half. Oh one more thing I forgot was to trim the back neckline which I’ve done here.
I’m going to attach it to the side panels of my front piece. Again pin very generously.
This time I’m just going to use a half inch seam allowance.
Next, fold the hem of the cardigan. it would be very helpful if you first fold and press it. So what I did was make a large fold first around 5/8th of an inch. You can use your measurement tape or seam gauge to make sure you are folding the right length every few centimeters. And then I unfolded and made another fold half way through. Next, I’m going to sew it in place.
The next step is to set in the sleeves. So to do that I’m first going to place two marks away from the center using my chalk. Then, I’m going to do a basting stitch from one mark to the other. Next, I’ll pull the bobbin thread to add some gathers. These gathers shouldn’t be too prominent.
Next fold the hem of sleeves. I folded the hem once, pressed it and then folded again and then I sewed it in place.
Now I’m going to sew the sides of the sleeves together.
Okay that’s all done, now it’s time to attach the sleeve to the cardigan.
So turn the cardigan wrong side out, and turn your sleeves right side out. Place it inside the arm hole so that the right sides are matching. Start pinning, aligning the seams first, and then go all around.
Ease away the gather making sure there are no puckers. And keep pinning. Next, sew this in place.
Repeat for the other sleeve.
Now the final step is to finish off every single seam because remember it’s silk! Now I’ll show you how to press in place. You gotta press the sleeves towards the back so this is my front side and that’s the back side. I’ll press it towards the back.
And for the shoulder seams, just press it downwards towards the hem of the sleeves.
That’s it you’re done! Thanks so much for watching. Do comment, share and subscribe to support our channel. J


Leave a Reply