So, now we’re in the third week of Bag Sewing Secrets series and I’m hoping you girls are finding it helpful, if not; do let me know, we can stop this right here or try to make it more useful.
As promised, today’s episode is about sewing a recessed zippers to make the bags look totally pro!

The bag in the picture is the one I had been talking about on Facebook for past few days. It’s done and the pattern is still in progress because I had been so lazy this entire week I was studying and relaxing (we had 1 week holidays). I had actually planned on firing up the post on Saturday, but then I saw the newsletter had already been sent, so you girls wouldn’t have seen it this week either ways. Hence I planned it to go live next week. XD Okay, you might be super bored now, enough of my boring excuses real story, onto the tutorial NOW!
How to Sew a Recessed Zipper?
There are actually two ways of sewing a recessed zipper, I’m showing one here today, hopefully soon I’ll be posting about the second one, or you can also read about it in the next bag pattern.
Notions and Supplies:
- A zipper
- exterior fabric
- lining fabric
Note: My bag is 12″ in width, 15″ in height and 3″ in depth.
Based on that my top flaps are 12″x3″ in size.
And the zipper pieces are 12″x1″ in size.
Cut out the lengths of fabric.
Cut 2 of the top flaps.
Cut 4 of the zipper pieces.
Cut out the interfacing for all your pieces. Make sure you keep the interfacing an inch shorter from all sides to avoid bulk while sewing.
Fuse all the pieces to the interfacing.
Sew in your zipper tabs. Read this tutorial on how to sew perfect zipper.
Sandwich your zipper in between two of the zipper pieces and sew from all sides as shown.
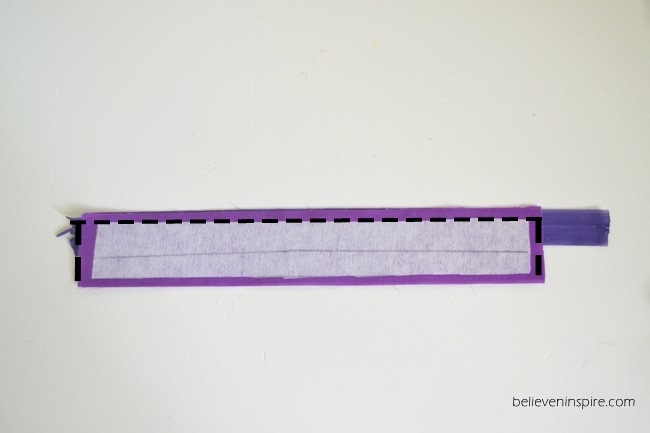
Next, turn and sew a topstitch as shown.
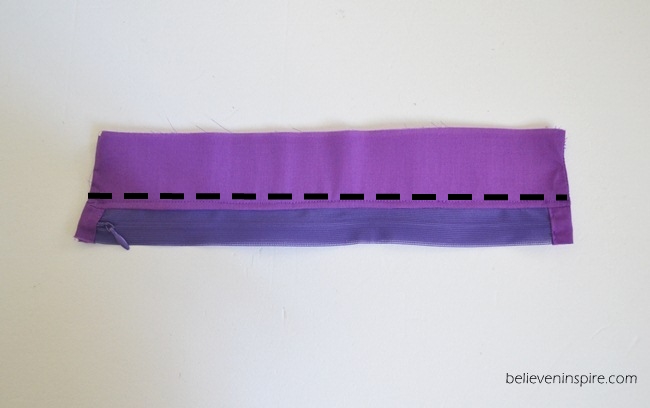
Repeat the same procedure with the other two zipper pieces. Place the other two zipper pieces on top as represented by the black rectangle.
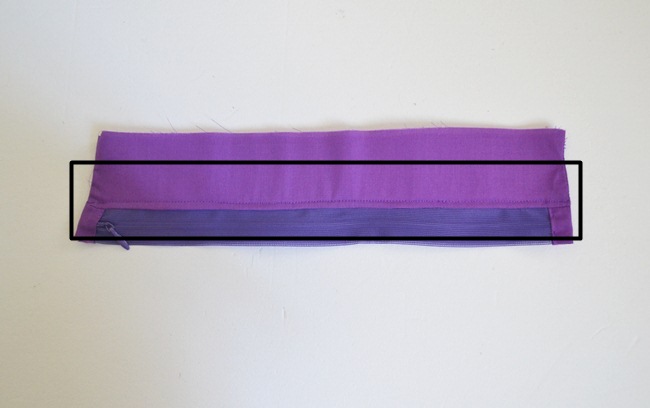
Sew on top as shown by the dotted lines. Make sure you push the corner of the zipper inside while sewing the sides.
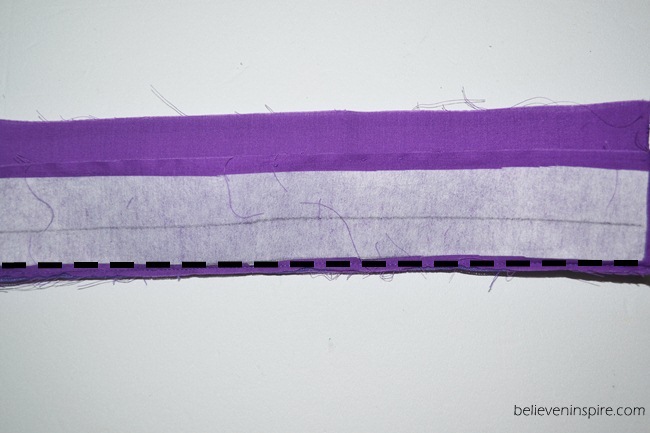
Turn the right side out and topstitch again. You should have something like this.
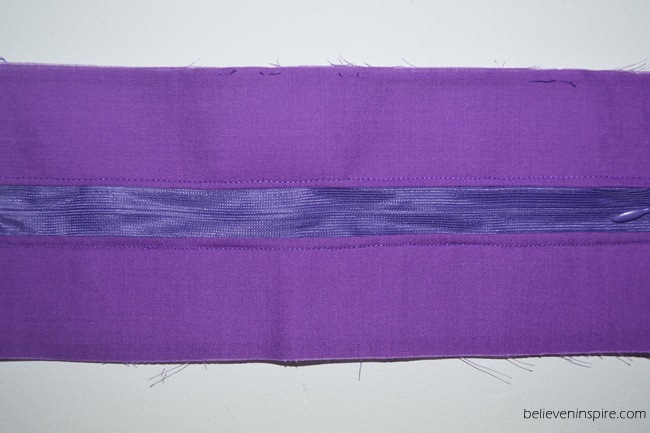
Next, place your lining fabric right side up, place the zipper flap on top of it followed by the top flap, right side facing down. The zipper flap should be sandwiched in between the lining and top flap. Sew.
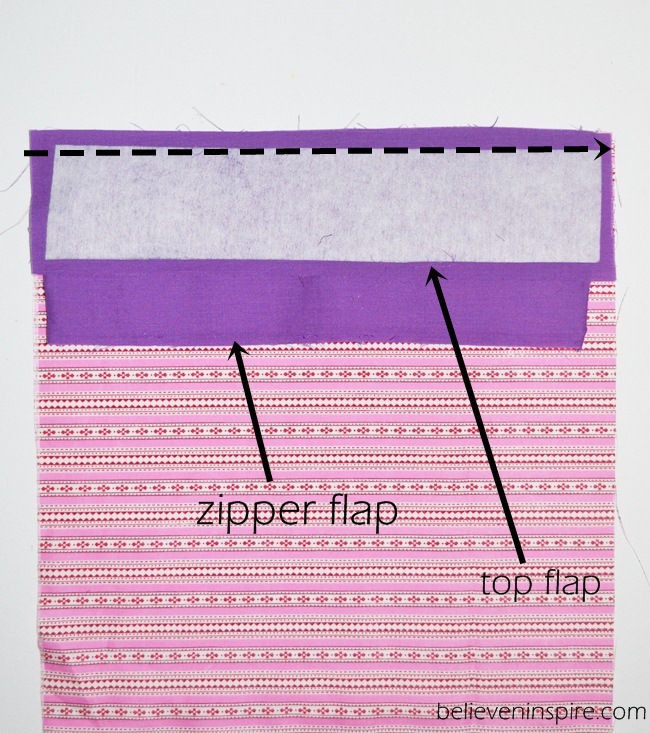
Turn the flap up and topstitch as shown by the dotted line.
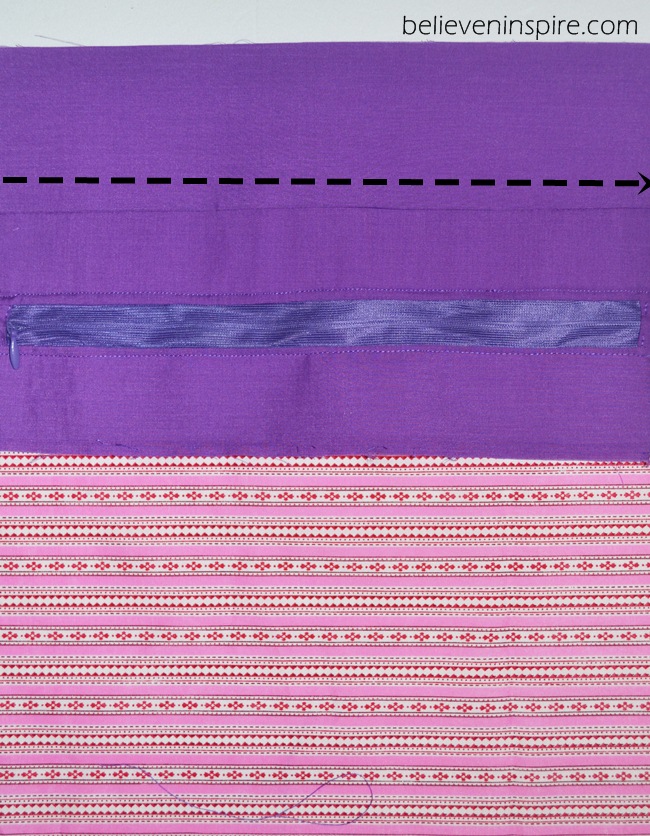
Repeat the same with the other top flap. And this is how it should look like in the end.

I hope this was useful, I tried my best describing the steps (something I totally suck at >.< ) so, if you have any questions, drop by a line and I shall reply to you in your inbox.
If you missed the two previous episodes, you can catch them here 😀
Linking up to these blogs:
Not just a housewife, Savvy Southern Style, Funky Junk Interiors, French Country Cottage, Six Sister’s Stuff, Sew Much Ado, DIY Show Off, I heart Naptime, Craft berry Bush, Coastal Charm, DIY by Design, Too Much Time , The Charm of Home, Flamingo toes, Flour Me With Love, Someday Crafts, What’s Cooking Love, The Crafty Blog Stalker, Create Craft Love, My Romantic Home, Sugar Bee Crafts, Time to Sparkle @ The Gunny Sack, Home Stories A to Z, The Girl Creative, Kathe With an E, The 36th Avenue, Lil’ Luna, http://freshideastudio.com, My Re-purposed Life, 2 Crochet Hooks, It’s Overflowing, Live Laugh Rowe, One Dog Woof, One Project Closer, Glitter Glue and Paint, Natasha in Oz, Lolly Jane, Gina’s Craft Corner
This post first appeared on Believe&Inspire.
Don’t forget to sign up for our weekly summary of blog posts. Psst. there are FREE printables hidden inside! XD


great step by step tutorial on how to sew a recessed zipper! While still nervous, I think I can do it off these photos and your instructions! 🙂 Thanks for the tute!
Great tutorial! I stopped being nervous when it came to zippers as soon as I aquired a zipper foot for my (old) sewing machine! Now I sew pouches and pencil cases out of zippers like a breeze!
Oh, the zipper foot! <3 Such a savior!
I’m new to your site and a new follower from Home Cooking. I think you can teach me a lot of new things. 🙂 Thank you. Blessings.
Yeay! Thanks so much Linda, that’s a great compliment. <3