I’m a crazy fan of angry birds and I’m sure there are many others little ones who are far more crazy about Angry Birds than me and would LOVE to carry an Angry Bird bag to school this year. So, today I’m going to show you how to make Angry Birds bag by yourself for a small price instead of spending loads of money on a store bought one. This tutorial comes with a FREE bag pattern too! So read on.

Pin this image on your sewing board to refer to it later.
How to make Angry Birds Bag
Difficulty: intermediate
DISCLAIMER: Some of the links in this post are affiliate links and I will receive a small compensation for any purchase made through this link.
Supplies:
- Red cotton or home decor fabric (1 yard)
- Lining fabric (1 yard)
- 20″ red zipper
- Woven Interfacing (Pellon Shapeflex SF101) (1 yard)
- Fusible fleece (Pellon Thermolam TP971F) (1 yard)
- Red, orange, black and white felt
- Strap adjusters (2 1″)
- D-rings (2 1″)
- Fabric glue
- Free pattern (Sign up below to get the FREE pattern)
By signing up you also agree on receiving weekly newsletters. Unsubscribe anytime.
Printing:
Print the pattern on actual size or 100%. Do not select fit to scale.
Cutting:
Cut out the pattern pieces from the template. Cut out all the fabric pieces as well as felt pieces as mentioned on the pattern.
Additionally cut the following pieces:
- Zipper Gusset: 22″X 2.25″ (2 from lining, main, fleece and interfacing)
- Bottom and side gusset: 23″ X 4.5″ (1 from lining, main, fleece and interfacing)
- Straps: 3″x 30″ (2 from main and interfacing) (This length of strap is just a general measurement. You can modify this length based on the length perfect for your kid. Or you can also use a strap extender to make adjustable straps.)
- Strap Loops: 3″x 6″ (2 from main and interfacing)
- Strap cover: 3″x 11″ (1 from main and interfacing)
- Zipper tab: 2″x 1″ (2 from main and interfacing)
Tip: Label all the pieces with a post it note to avoid confusion.
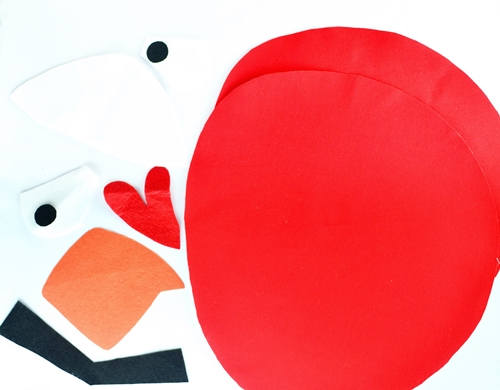
Checklist
You should have the following pieces before you begin:
- 2 body pieces from main fabric (front and back)
- 2 body pieces from lining fabric (front and back)
- 2 interfacing for body pieces (front and back)
- 2 fusible fleece for body pieces (front and back)
- 2 zipper gusset from main fabric
- 2 zipper gusset from lining fabric
- 2 zipper gusset from interfacing
- 2 zipper gusset from fusible fleece
- 1 side/bottom gusset from main fabric
- 1 side/bottom gusset from lining fabric
- 1 side/bottom gusset from interfacing
- 1 side/bottom gusset from fusible fleece
- 2 strap pieces from main fabric
- 2 strap pieces from interfacing
- 2 strap loop pieces from main fabric
- 2 strap loop pieces from interfacing
- 1 strap cover from main fabric
- 1 strap cover from interfacing
- 1 left eye from white felt
- 1 right eye from white felt
- 1 beak from orange felt
- 1 eyebrows from black felt
- 2 eye balls from black felt
- 1 tummy from white felt
- 2 zipper tabs from main
- 2 zipper tabs from interfacing
Instructions
Step 1: Fuse the interfacing and fusible fleece to their respective pieces.
Step 2: Make the face
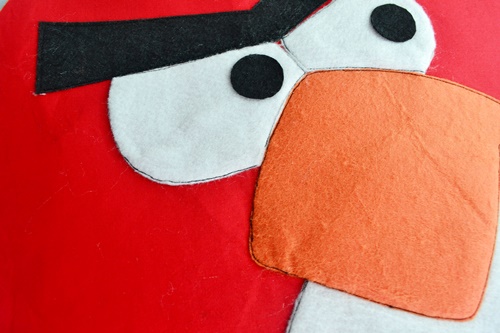
Glue the tummy onto the bottom of the main body.
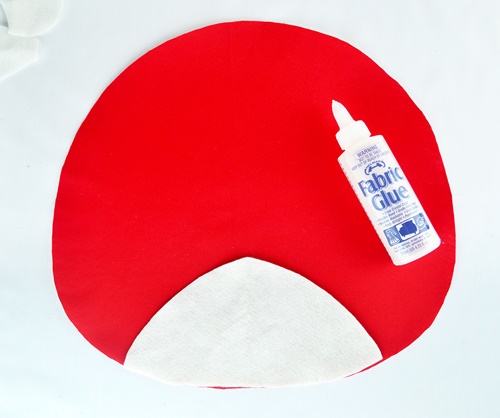
Next, glue the beak in place on top of the tummy.
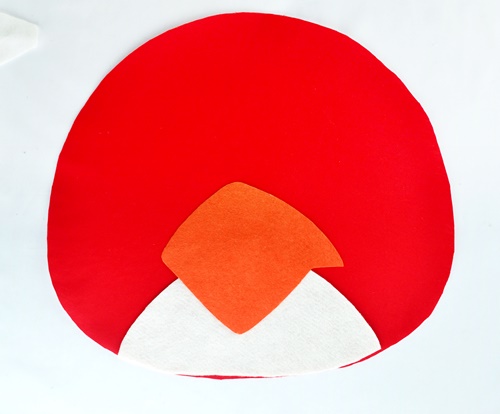
Now glue the eyes and eyebrows. Keep aside.
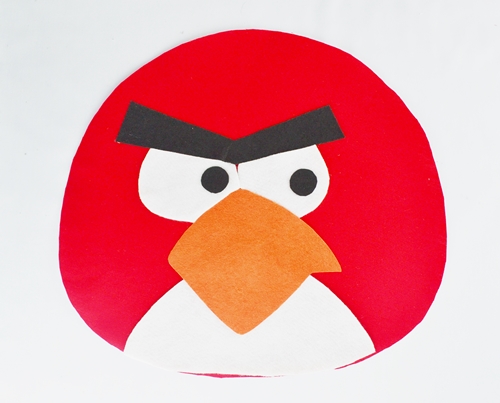
Next, using the long stitch length on your machine top-stitch along the edges of the shapes.
More steps on the next page.


How or where do I find the pattern?
This is so awesome! I am definitely sharing this pattern and tutorial! Thanks so much! 🙂 Lisa