One thing that I’ve always felt a need of when going out on tours and stuff is a mini crossbody bag to keep just the basic supplies like wallet, keys and phone, because in some places it’s such a hassle to carry a large bag, don’t you think?
Hence I made this mini crossbody bag and in this post I’m sharing the tutorial on how to make one.
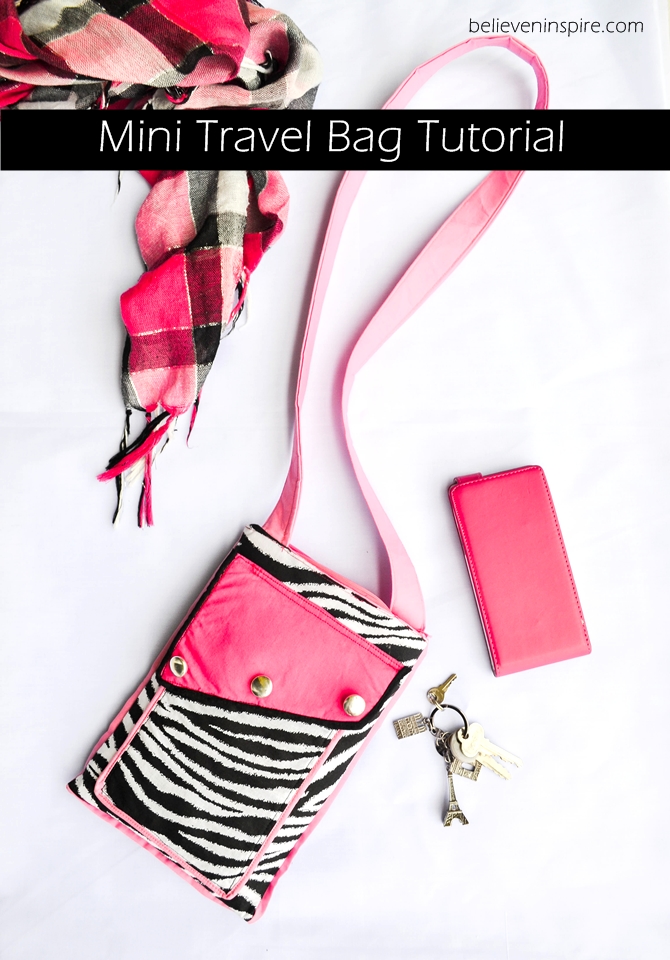
I decided to use the recently bought zebra print fabric from Spotlight because I absolutely love the print especially when paired with pink.
Travel Crossbody Bag Tutorial
Difficulty level: Intermediate
Supplies
- 1/4 yard main fabric
- 1/4 yard lining
- 1/2 yard contrast fabric for piping, flap and straps
- 6″ zipper
Cutting
Cut out the following pieces of fabric:
- A= 7″x 10″ (2 from main fabric for the body)
- B= 7″x 10″ (2 from the lining fabric for the body)
- C= 5.5″x 8″ (2 from the main fabric for the pocket)
- D= 2 from contrast fabric for the flap
- E= 3″x 7″ Zipper cover from the lining fabric
- F= 1x 53″ for the bias tape from the contrast fabric
Cut out the interfacing for all the pieces of A, B, and D.
Instructions: Make the front piece
Fuse the interfacing to their respective pieces.
Take your two C pieces so that the right sides are facing each other and sew all around, leaving a gap. Clip the corners and turn the right side out through the gap. Press and edge stitch. Sew in the bias tape. You can check out this tutorial for sewing in the bias tape.
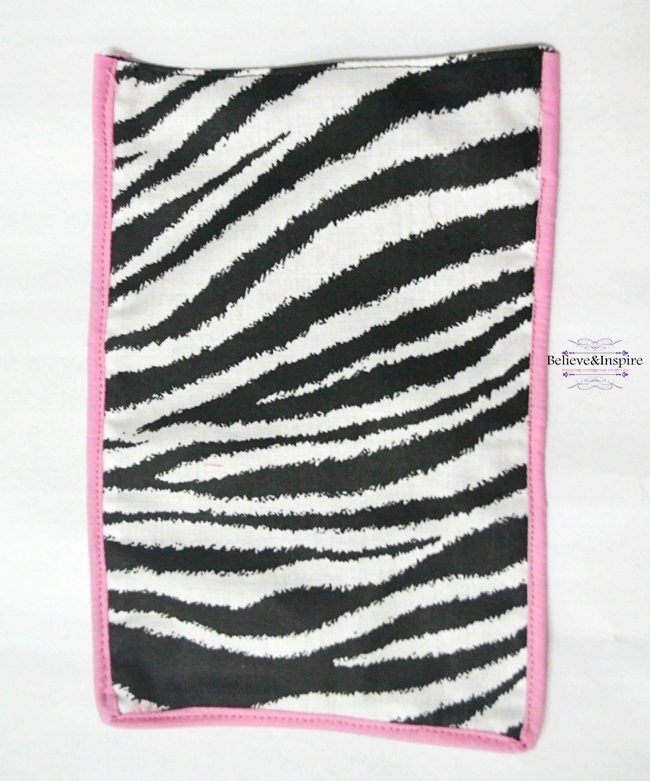
Repeat these steps with the D pieces.
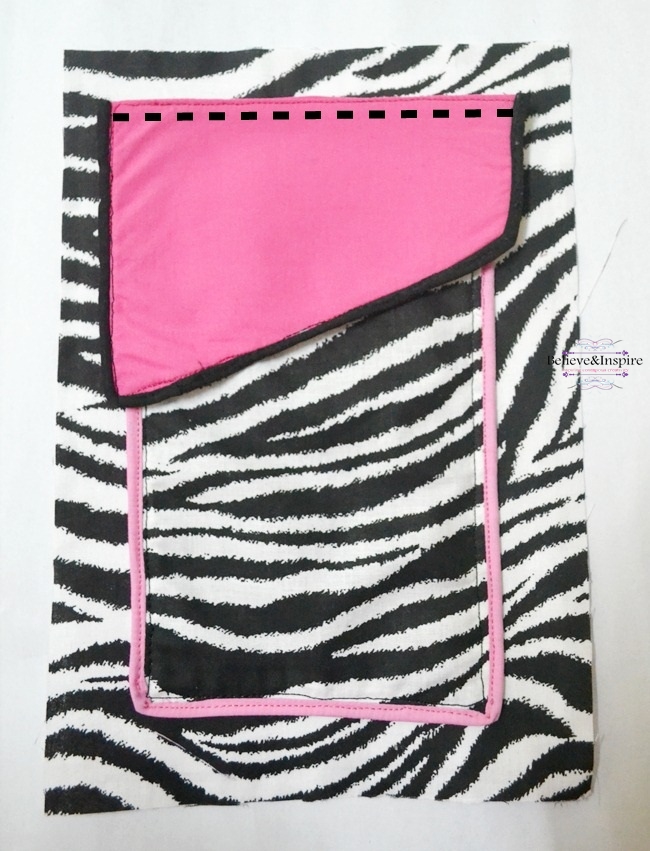
Next, pin the pieces onto the main piece and sew. Place the pocket first and sew from three sides, then place the flap and sew along the top edge as shown by the dotted line.
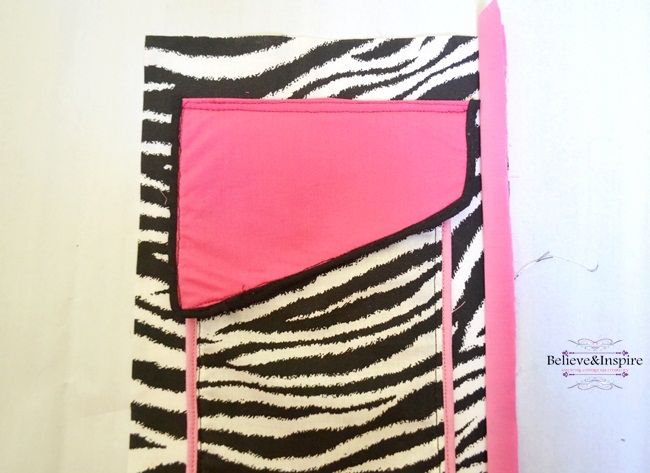
Next, take your remaining bias tape piece, fold it from the middle and press, next place it onto your front piece on the right side, so that the edges are aligned as shown. Now, place the back piece on top so that the right side of the back piece faces the right side of the front piece. Pin and sew all around.
Make the zipper:
First, prepare your zipper according to the tutorial here.
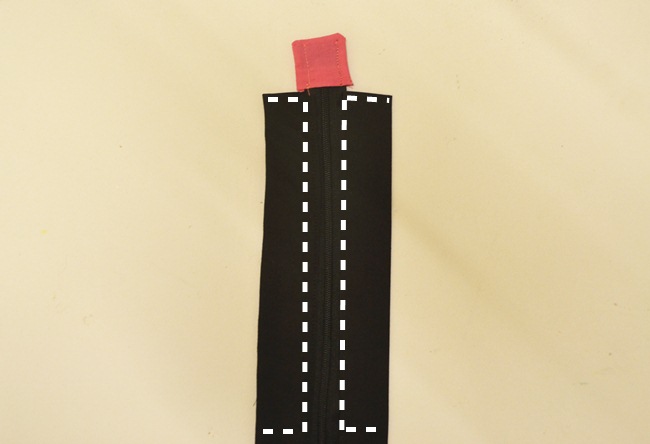
Next, take your zipper covers and fold them from the middle and press. Now, fold the outer edges towards the center crease and press. Place the folded pieces on your zipper on both sides as shown and sew along the dotted lines.
Next, place your zipper 1″ from the top of the lining fabric, pin and sew along the dotted lines.
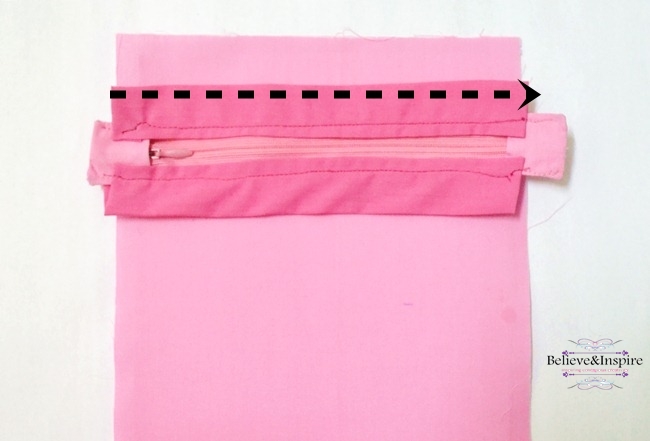
Repeat the same with the other side.
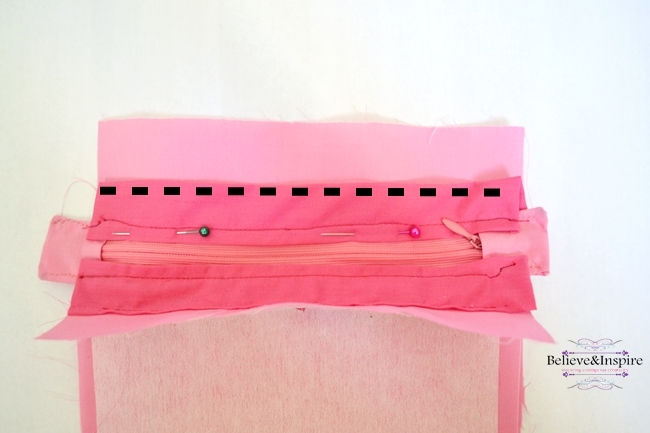
After you’re done with the zippers sew the lining from three sides and clip the corners.
Make the strap through the tutorial here.
Assemble the bag:
First, take your lining and main bodies of the bag, fold and press the edge of both as shown.
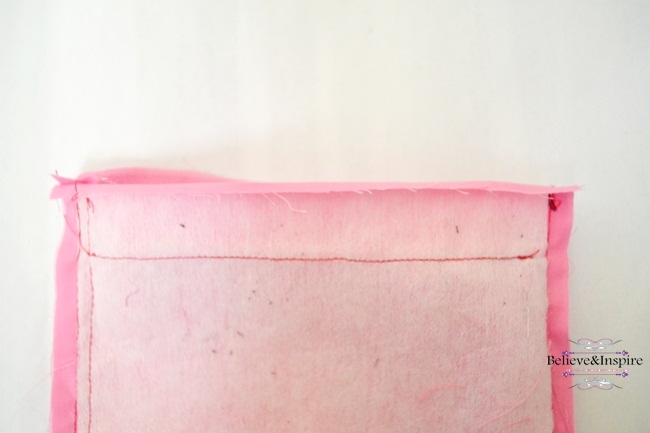
Next, insert the lining inside the main body so that the wrong sides are facing each other. Align the top.
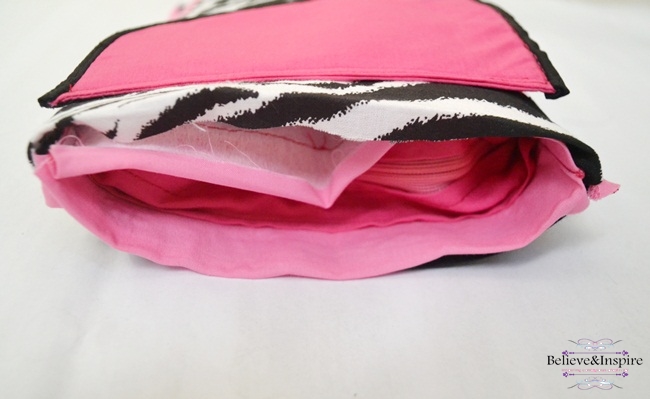
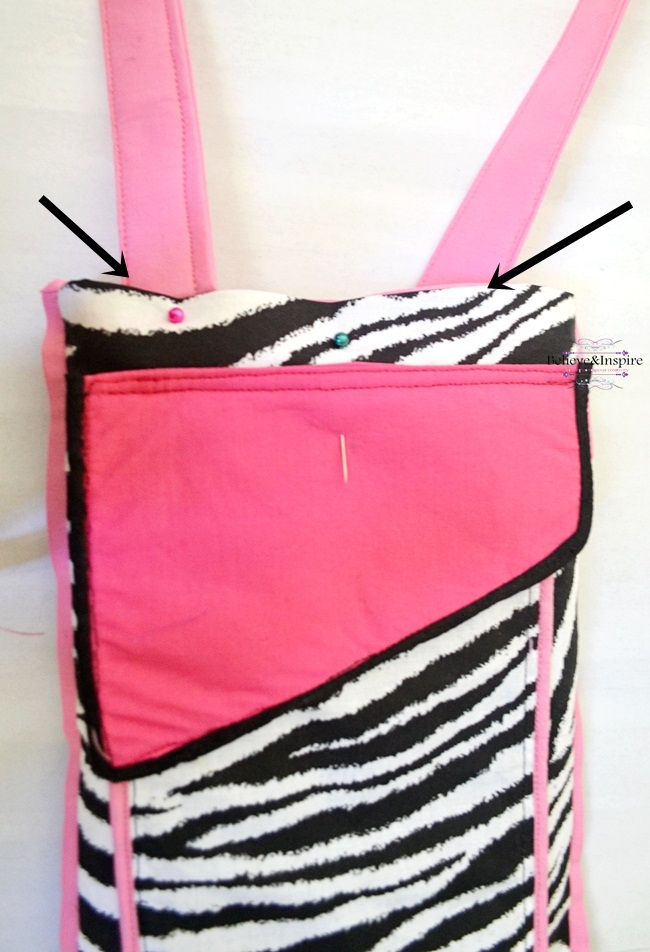
Pin your straps in place, one at the front and other at the back. The strap should be sandwiched between the lining and main body. Finally sew all around.
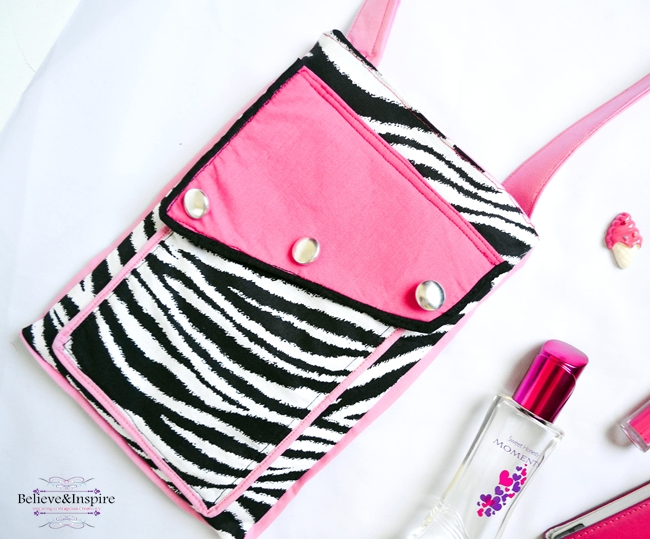
Add buttons or any other adornments if you wish, and you’re DONE! XD
Enjoy your bag! I surely am. I took the bag out with me for riding today as I only needed a place for my wallet, keys and phone and this bag is perfect for it.
Feel free to contact me if you have any questions and don’t forget to subscribe for more awesome sewing ideas.
Bloopers:
Oh wait, now it’s time for some bloopers.
You must be wondering why the shade of the flap is different from the other pink. If you didn’t notice, you make me so happy *huggs*.
But, for the very observant of you girls, here is the story:
I had actually planned on using piping for this entire project, the places where I ended up using the bias tape, I mean.
But, when I made the flap, it turned out so UGLY. The edges were not sharp and it just looked so gross to me, as you can see in this picture. This was actually the second try. First, I made the flap, sewed it from all sides, turned the right side out and only after I had done my edge stitch I realised I had FORGOTTEN the piping. Oh the dread! So with my bff aka seam ripper I undid the WHOLE thing and started again, this time WITH piping and sadly, I did not like how it ended.

I really didn’t wanna go through all the hassle of using the seam ripper again. But, there was another problem -a nightmare for all the sewists perhaps- I WAS OUT OF baby pink fabric *wail*.
Yea, so that’s why I had to use the darker shade of pink.
And that’s how after THREE trials I finally got the flap right. Whew! Happy ending!
So, the moral of the story is—-> Sewing can get frustrating at times, but don’t you worry, have your BFF (by now you should know who I’m talking about 😉 ) always by your side, relax and you’d do just fine. 🙂


What a sweet little bag, I love how much detail you packed into it.
Thanks for the sweet comment Julie. I wanted to try something out of ordinary for this one. Haha
Your bag turned out so cute and it’s just the perfect size! I love the combination of pink and zebra print too.
Thanks so much Rebecca! Yea, the size is so convenient.
Cute bag! Thank you for joining Home Sweet Home!
I actually didn’t notice the different pinks until you pointed it out. And I like the extra pop of the darker pink! Super cute, will need to make one this weekend for a conference trip next week! 🙂
I like the two pinks and thought is was intentional. Sarah Molten (one of many famous chef’s) said about cooking, always just act like that is the way it is suppose to be. Sounds like good advice for many things including sewing. (-:
The bag is perfect for my mom. She is 85 and has problems carrying things these days. Getting ready to sew one up and surprise her.. She loves when I make things for her.
Thanks for the instructions!