In this post, I’m sharing the tutorial for big and beautiful DIY luggage tags that anyone can sew and something which you can spot from MILES AWAY, making it easier to pick out your luggage! Wohoo!
It’s early morning, you just got out of the immigration, you’re tired as hell, it was a long and hectic midnight flight and the only thing you want to do right now is have a warm shower and long sleep just like a new born baby. But, wait….
Before you can even get to that point, YOU NEED TO FIND YOUR LUGGAGE full of your favorite clothes and expensive perfumes you got from your mom. Heck! WHERE IS IT?
Ever been in a situation like this?
Spotting luggage can be SO TRICKY at times, and worse if your luggage tag breaks off (happened with me, and I was devastated. So, I made my own for the first time which you can get here: Ultimate One Stop Guide on How to Make Fabric Luggage Tags). Which is why this time, I decided to make some big and bold Schmancy Personalized Luggage Tags.
Read on for the tutorial.
It’s super easy and fun! I promise.
If you would like to get a copy of the complete tutorial for offline reading, you can do so by signing up for the newsletter.
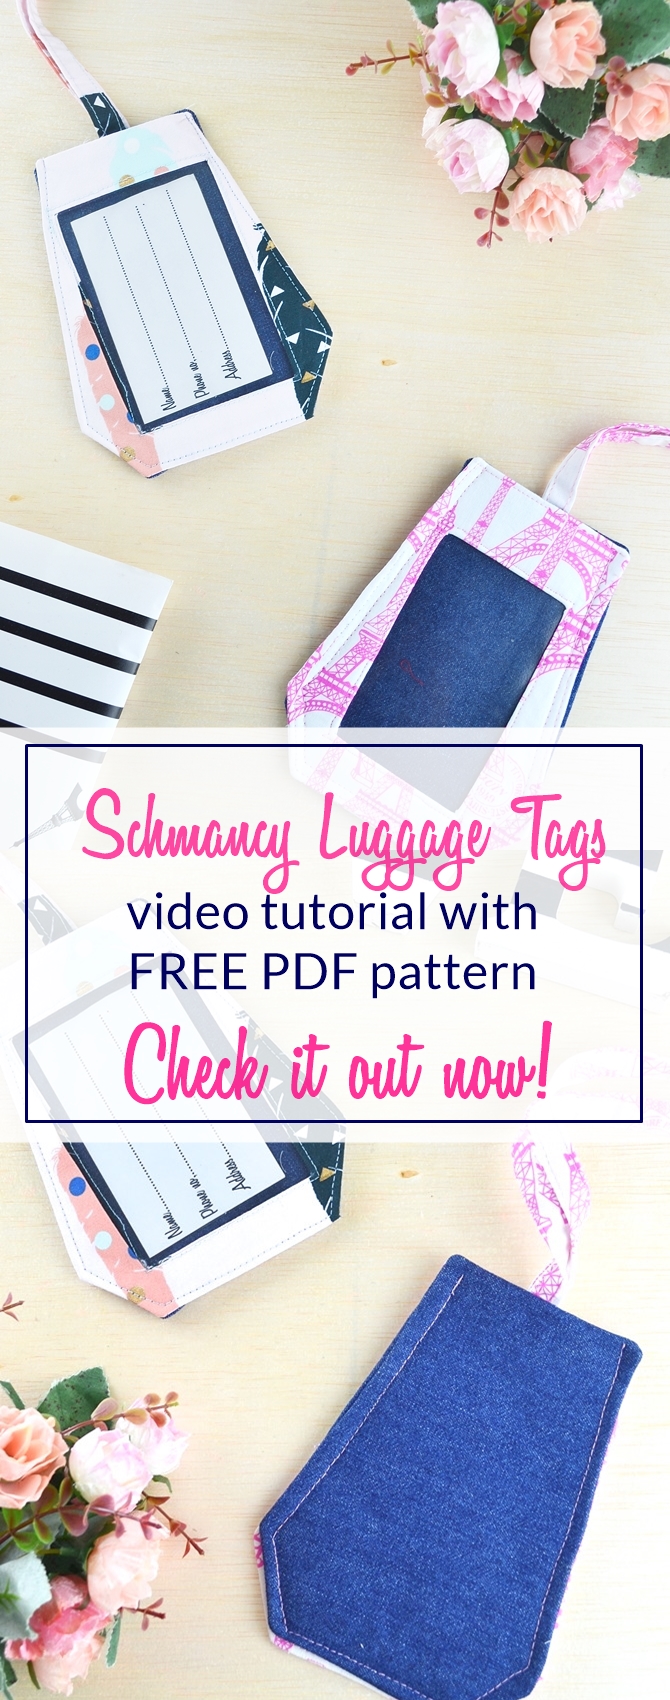
Pin this image of these cute luggage tags to your sewing board now!
Disclaimer: Some of the links in this post are affiliate links.
DIY Luggage Tags Sewing Tutorial
Supplies
Here’s a list of supplies you would need to make your own luggage tags
- 1/4 yard of fabric A (main body)
- 1/4 yard of fabric B (window panel)
- 1/4 yard medium weight fusible interfacing
- A piece (4″x3″) of thick clear plastic(You can also cut it out from a file, like I did 😉 )
- Clover clips
- Luggage tag pattern (Sign up below to get the pattern)
By signing up you also agree on receiving weekly newsletters. Unsubscribe anytime.
Wondering what are clover clips?
Well. here’s the answer.
Clover clips are small clasp like clips that come VERY handy to hold very thick layers together. The picture on the right shows a bunch of clover clips. Aren’t they cute?
Okay, so why use clover clips instead of pins?
Now, you must be wondering why I especially listed out clover clips for this luggage tag tutorial. Well, that’s because in this tutorial we will be using several layers of fabrics which will be fused to interfacing so if you add up all the layers, you will have at-least 8 layers to fabric + interfacing to sew together. Pins will take more time and can easily bend while trying to hold the pieces together, while clover clips make it absolutely easy and hassle free to keep the thick layers together.
Therefore, clover clips are the best choice for this luggage tag tutorial or any project that involves lots of layers.
Video tutorial for DIY luggage tags
Good for you, I also made a video tutorial!
If you prefer a written tutorial for DIY luggage tags instead, I’ve got you covered. No worries girl. Just read on!
GET WRITTEN INSTRUCTIONS IN PDF FORMAT
Sign up for the email list and get access to the FREE pattern and written instructions!
By signing up you also agree on receiving weekly newsletters. Unsubscribe anytime.
Cutting directions for DIY luggage tags
Cut out the following pieces
- 2 main panels from fabric A using the luggage tag template provided
- 2 window panels from fabric B using the template provided
- 4 fusible interfacing from the template provided (2 for main panels and 2 for window panels)
- 1 strap from fabric B and fusible interfacing measuring 2″x15″
- 1 piece of plastic measuring 4″x3″
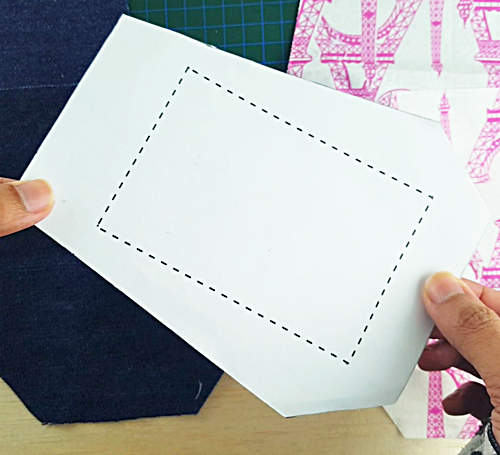
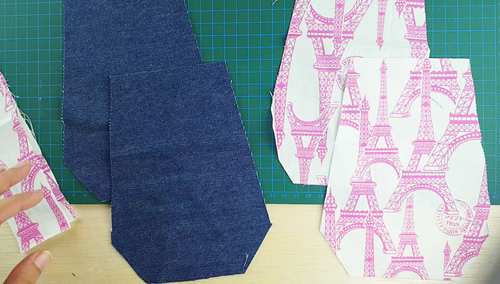
Sewing directions: how to make luggage tags
Step 1:
Fuse main and window panel interfacing to each of the main and window panels. Also, fuse strap fabric to strap interfacing.
Step 2:
Fold strap in a half, wrong sides together, matching the two longer raw edges and press to make a center crease.
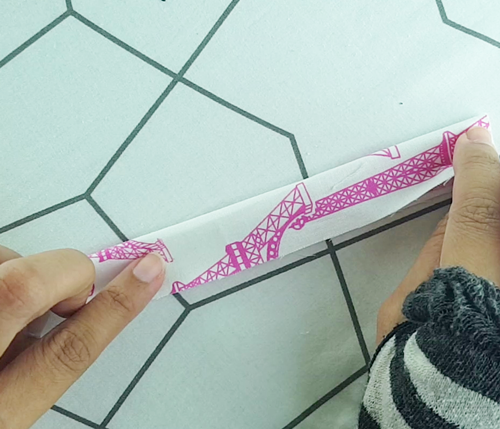
Step 3:
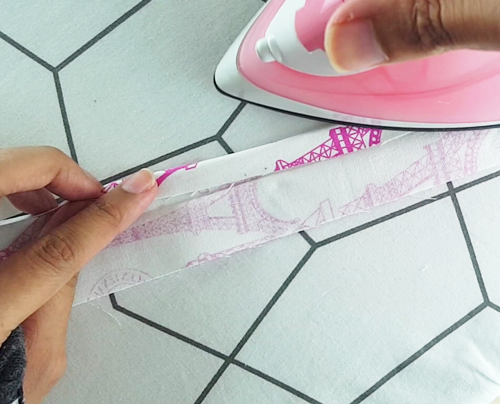
Open up the fold. Bring the longer edge to the center crease and press again as shown below.
Step 4:
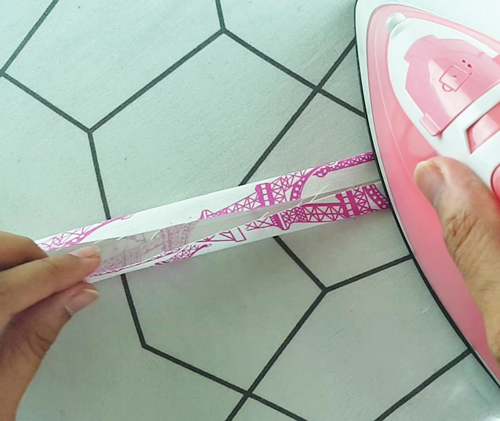
Repeat the same with the other side.
Step 5:
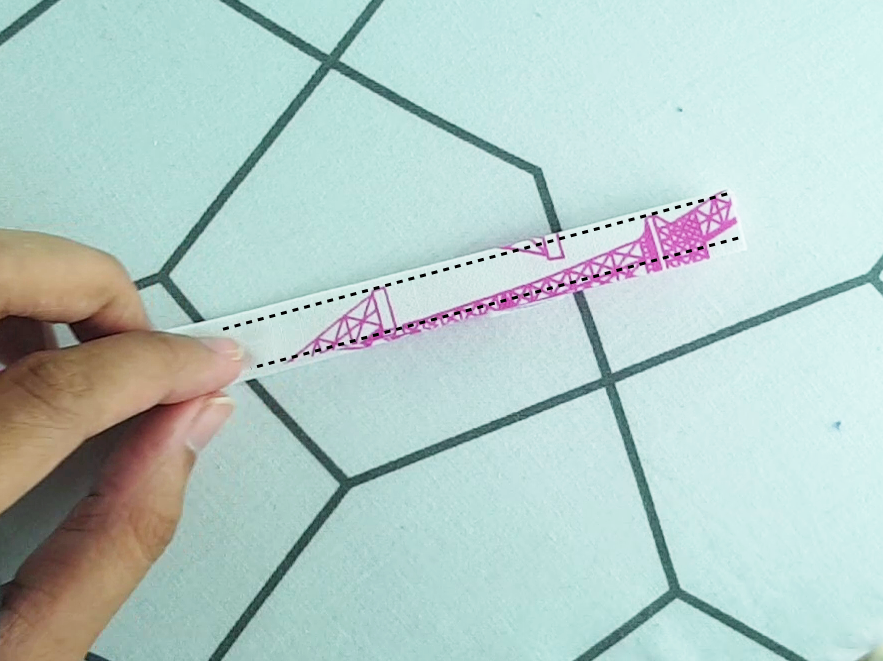
Fold again from the center, bringing the two folded edges together. Sew along the longer edges starting from one short end to other, using a seam allowance of 1/8″, as represented by the dotted lines.
Step 6:
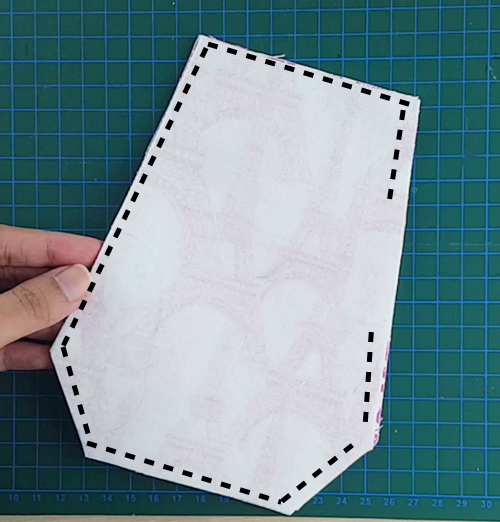
Place the two window panels right sides together. Sew all around as shown below, using a seam allowance of 3/8″. Leave a small gap on the side, to turn the right side out.
Step 7:
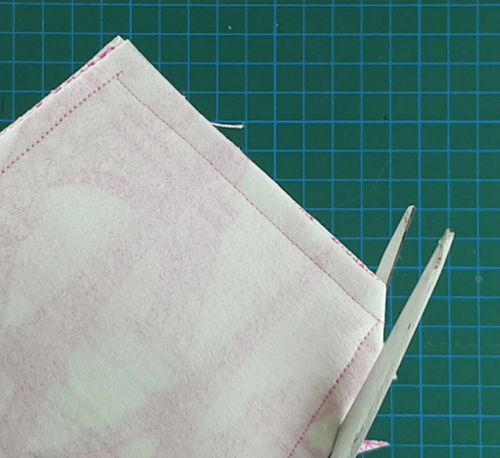
Clip the corners and trim the seam.
Turn right side out. Flatten the seams by pressing. Also, tuck in the raw edges of the opening to the wrong side, while pressing.
Top stitch all around using a seam allowance of 1/8”.
Step 8:
Fold finished strap in a half, bringing the two shorter edges together. Place the finished strap on the right side of one of the fabric A panel as shown, matching the top raw edge of panel to the raw edges of short side of strap.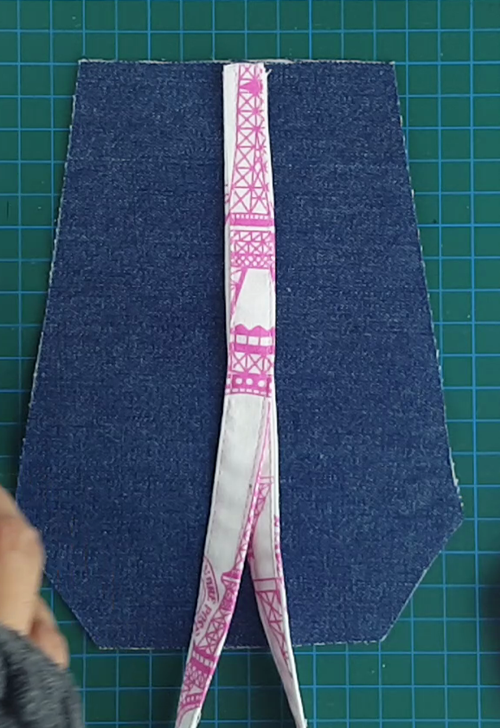
Go to the next page for more steps.


The answer to my prayers! I was looking for ideas for easy homemade luggage tags, and here you are. I MUST try this. Many Thanks!
These luggage tags are very attractive and the directions are well done. Thanks.
excellent project idea